Course Formats
Course formats allow you to layout your course in a way that makes sense for your teaching. There are a number of formats available for you to choose for your course. We've described them below. You can choose a Course format by:
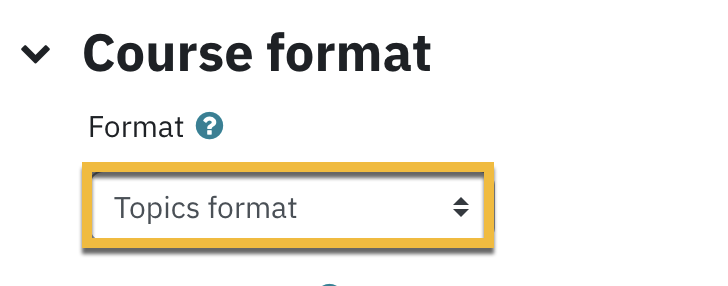
- Clicking on Settings in the top row

- Scroll down to the Course format section
- Select your preferred option from the Format drop-down list
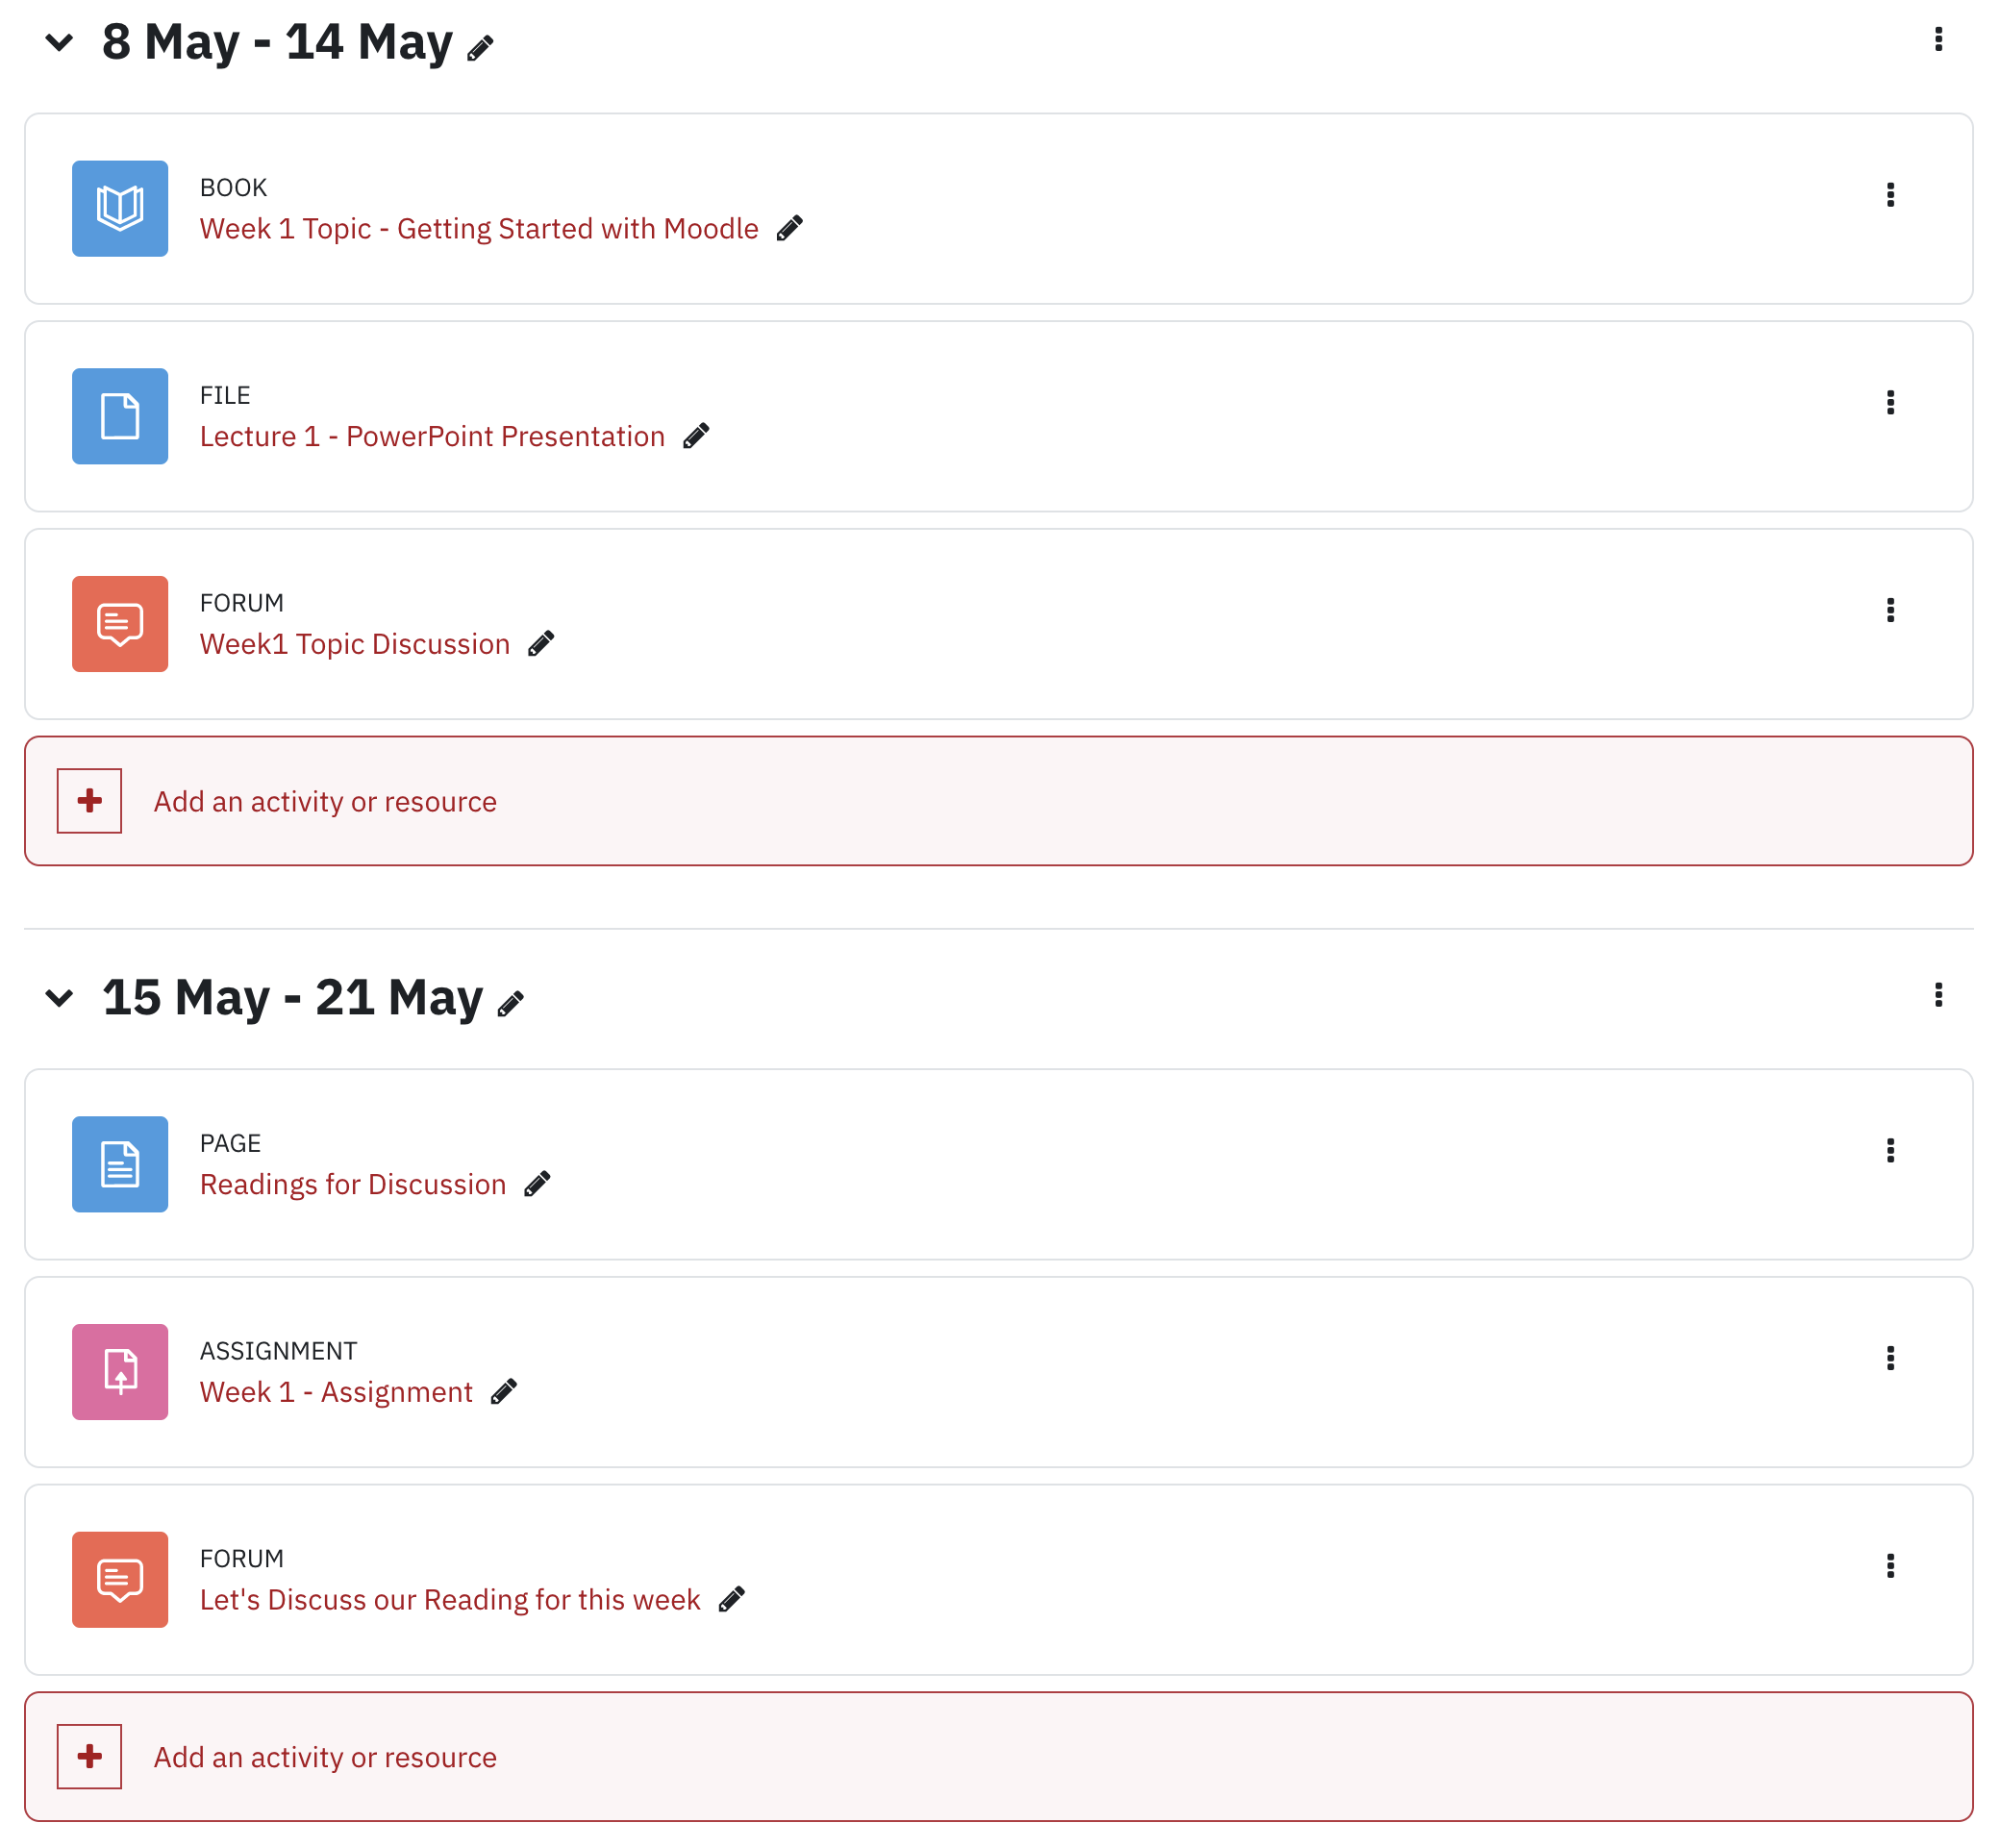
Weekly Format
The Weekly format will automatically create one section for each week using your Course start date as a starting point. With editing turned on you can edit  the weekly titles and also add more sections.
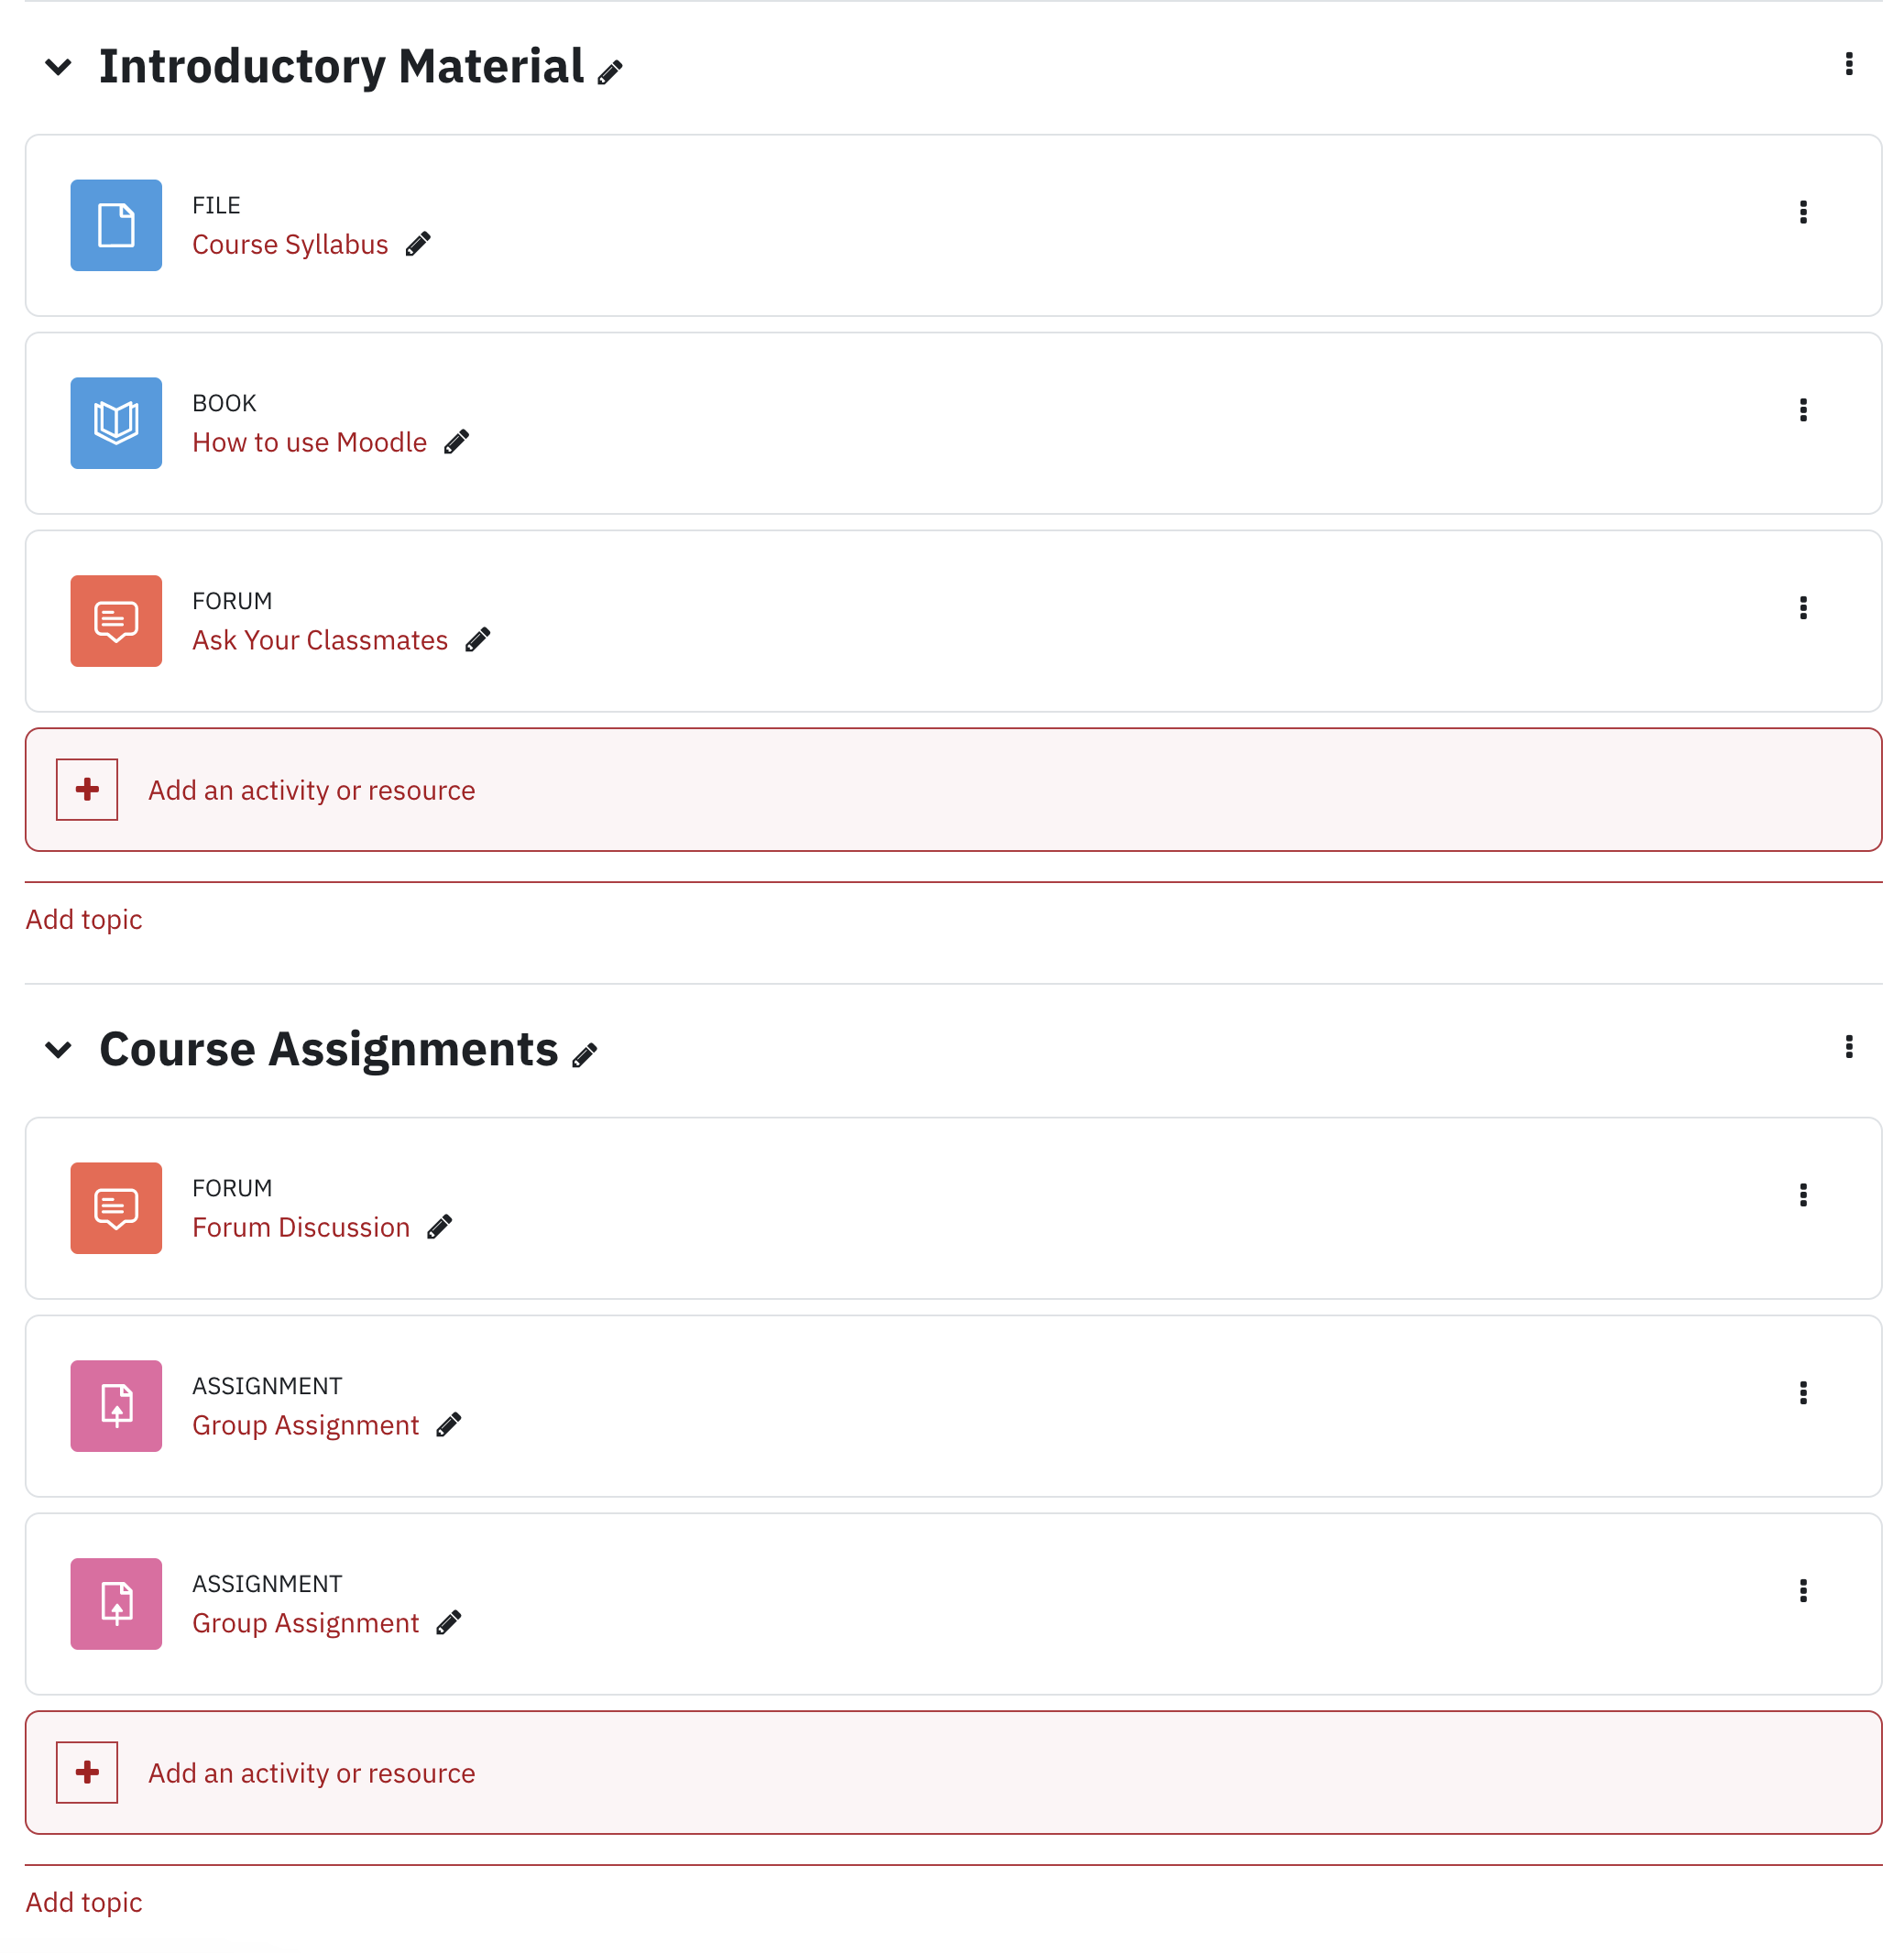
Topics Format
Topics format allows you to be slightly more flexible in the organization of course materials. Instructors can name the section titles as appropriate. For example, if a unit of study or topic extends beyond one week, it might be convenient to organize the materials into one section instead of organizing them by the week.
With editing turned on you can edit the weekly titles or Add more topics  .
.
Menu/Tab Format
The Menu/Tab course format provides a visual, organized display of your course content.
For more information about using the Menu/Tab format in your course please visit https://lthelp.yorku.ca/setting-up-your-course/menu-tab-format
Grid Format
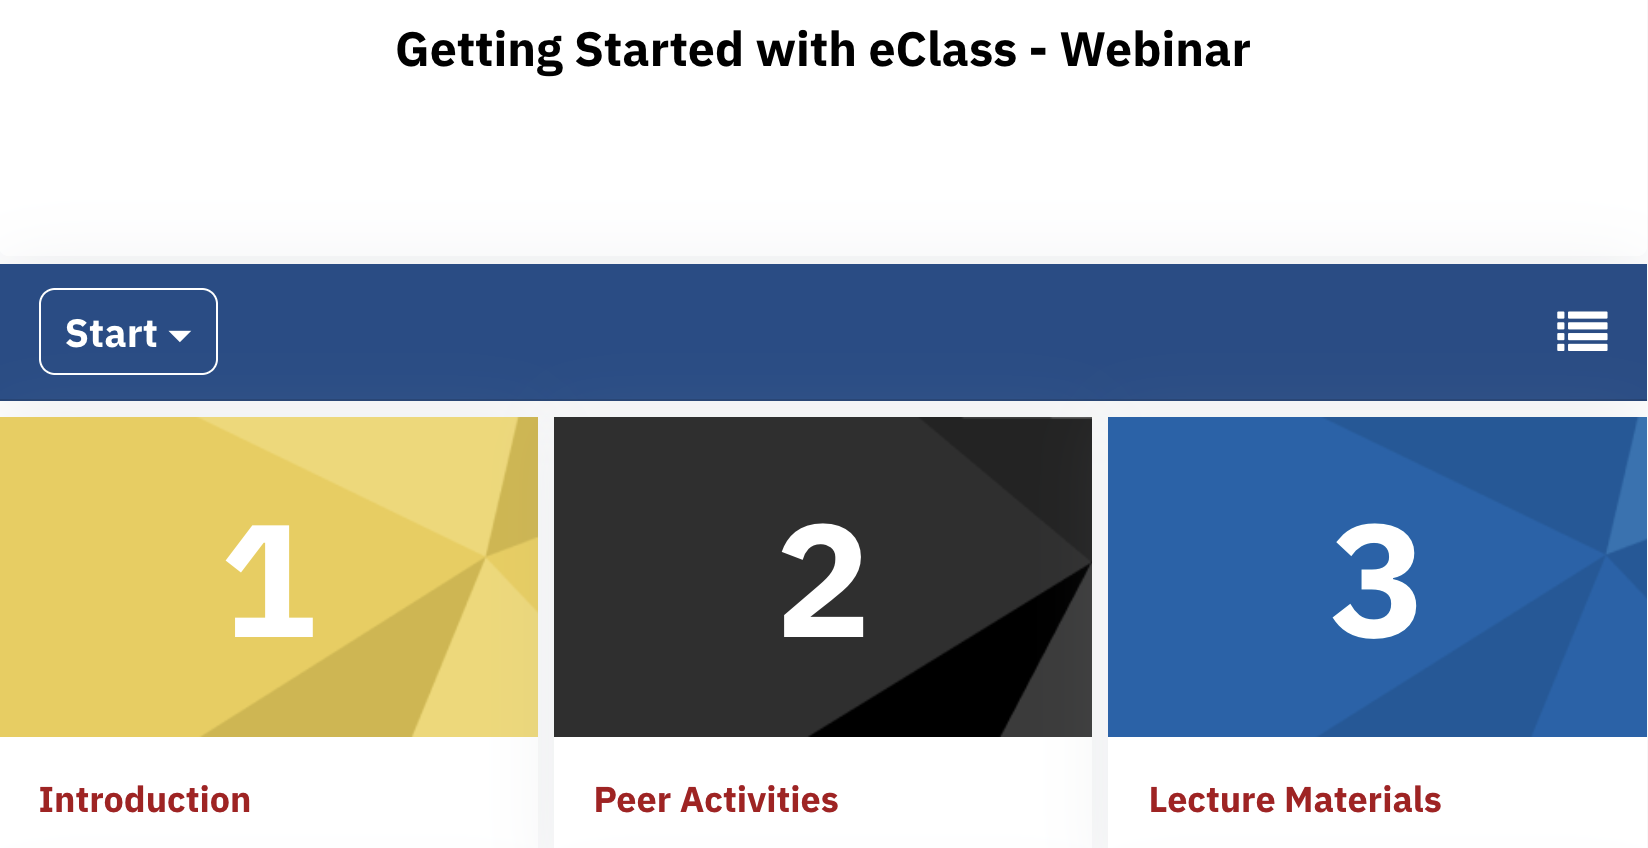
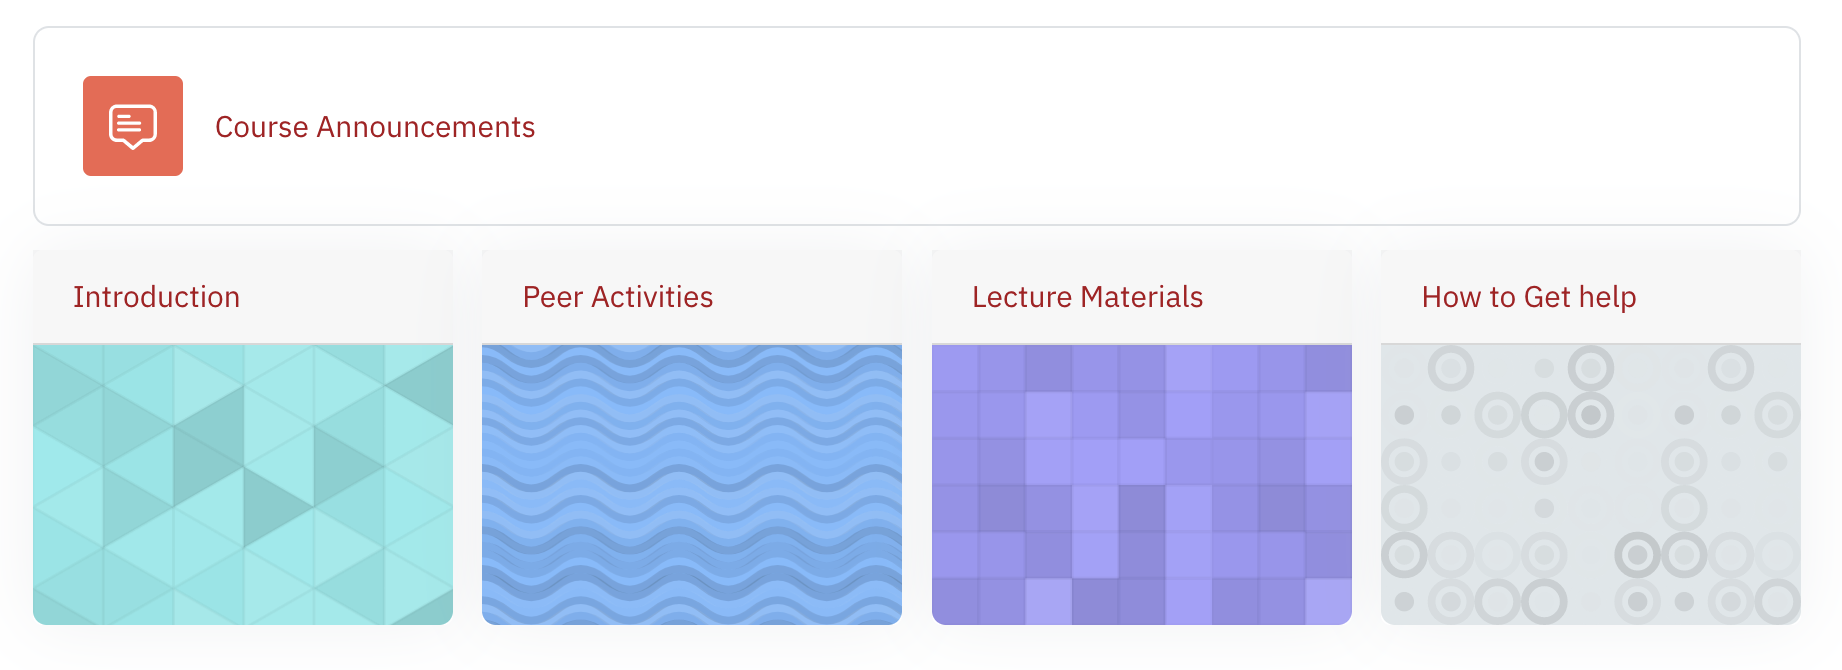
In this format, the course is organized into a modular and visual course format that hides all topics and creates a grid of icons (one for each topic) with short titles. Clicking on an icon brings up the content from the corresponding topic.
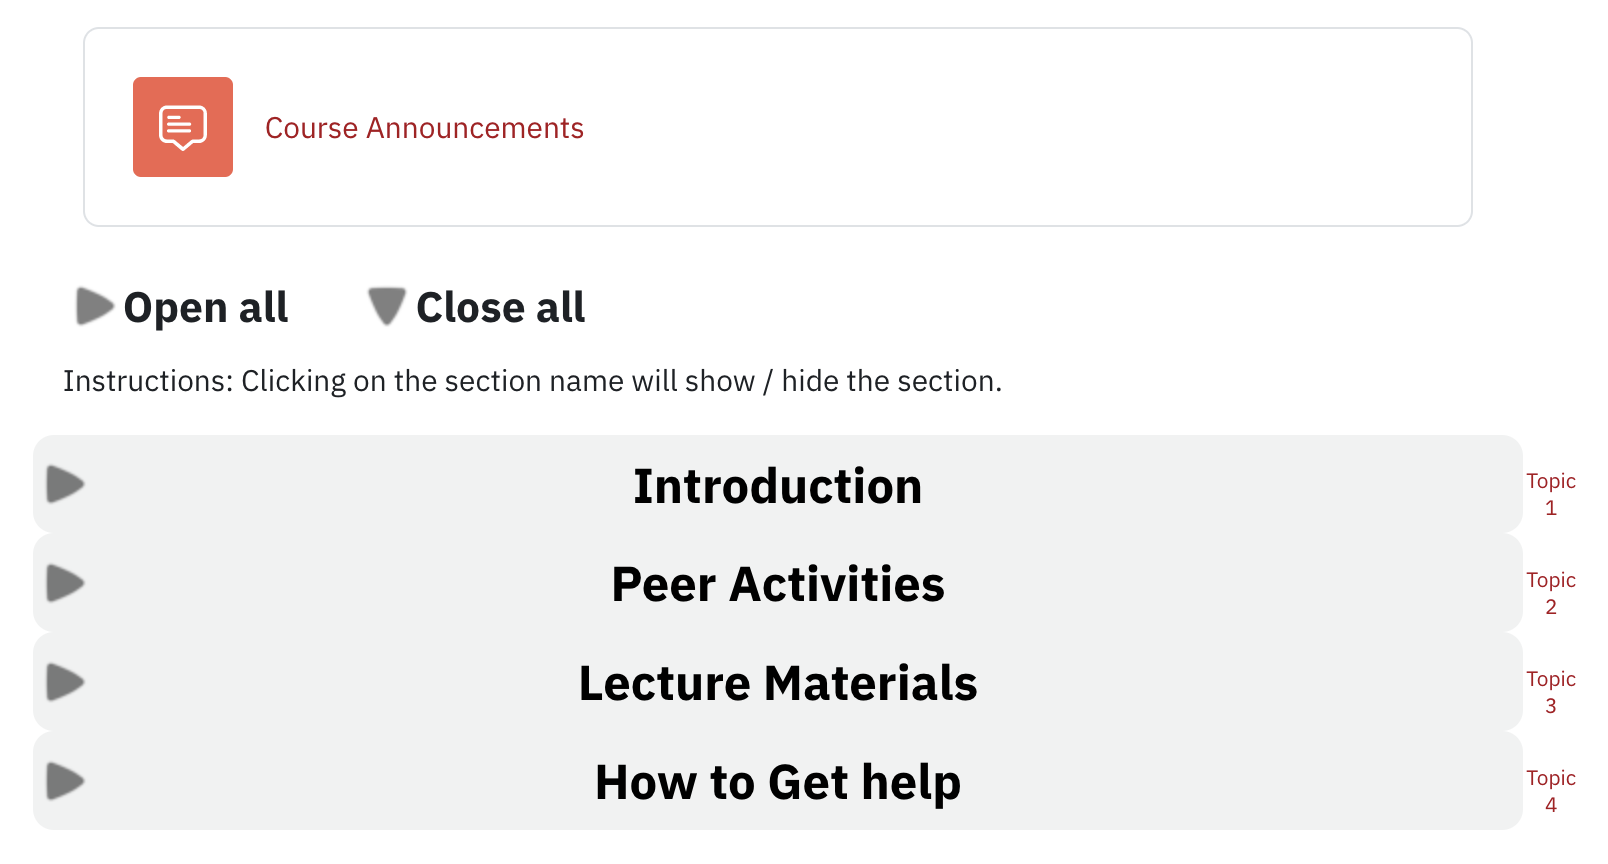
Collapsed Topics Format
Collapsed Topics format is similar to topics format. It allows you to organize course material into sections based on topic or weekly structure. In this format, all sections except the top section have a toggle that is used to display/hide the section. One or more sections can be displayed at the same time.
With editing turned on you can edit the weekly titles or Add topics
Flexible Sections Format
Flexible sections organize course content in any number of sections that can be nested. As the course instructor, you are able to collapse or expand the topics.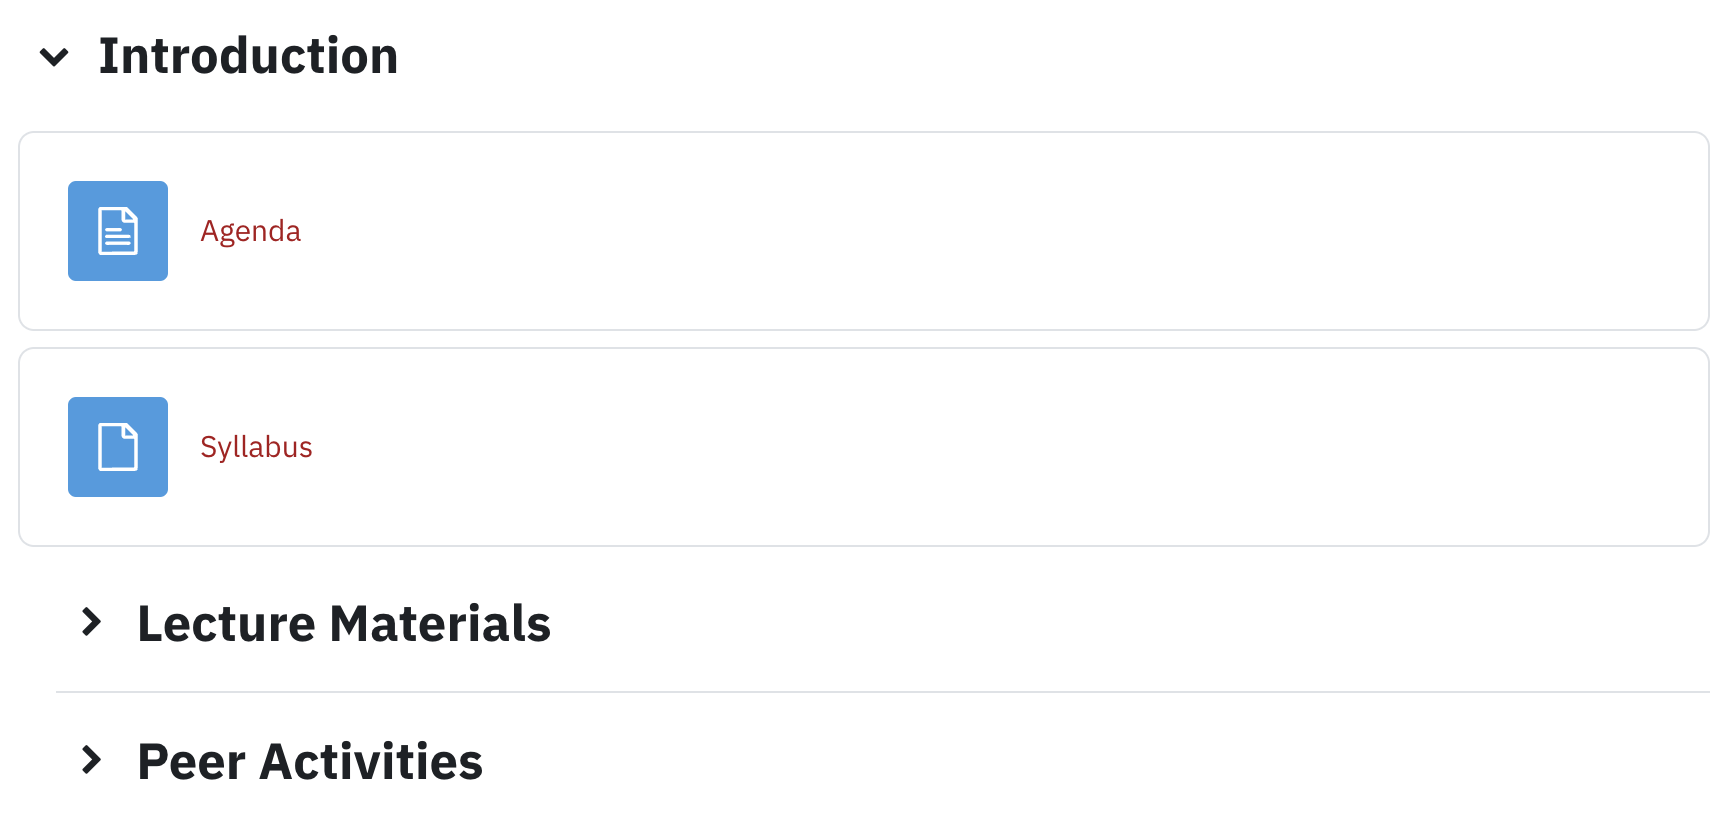
Socialwall Format
This format allows you to add course material such as files, URLs, resources and activities as an attachment to a post. It displays a timeline of posts containing the course material. Socialwall format allows instructors to leave comments, reply to comments, like posts, make sticky posts, attach files and URLs to posts and attach activities to timeline-posts.
Single Activity Format
This format has only one section and allows the instructor to add only one activity to the course. If the course already contains an activity, selecting that type of activity will default to the first instance of the activity listed in the course.
You will be presented with the following warning when switching to single activity format "When changing the existing course format to "Single activity" make sure that you removed all extra activities from the course including the "News forum". Note that sections structure may be modified".
Social Format
This format is oriented around one forum, the social forum, where the only possibility for a user is to create new posts and respond to existing posts. This format does not allow instructors to leverage other resources/activities normally available to them with other course formats. The social forum description is displayed at the top of the course page and allows instructor to update forum settings.
Other course settings that affect the layout of your course
Course Layout
You can choose other course settings like course image, layout of course formats on the Edit course settings page for your course. Click on Settings in the top row which can be accessed from the top row.

If you plan to have a lot of resources and activities in your course, you may want to consider the One section per page layout in order to limit the amount of scrolling.
Show One Section per Page Layout
By default, the course layout is set to display one section per page. In this layout option, all the course section titles are displayed on the course main page, and you can view resources and activities in each topic by clicking the topic link. Links to adjacent topics alongside the topic name will allow you to easily navigate to next and previous topic.
Show All Sections on One Page Layout
You can also choose Display all the sections on one page as your Course Layout. In this layout, the sections appear in order from top to bottom and the Resources and Activities for each section can also be accessed from the main course page.
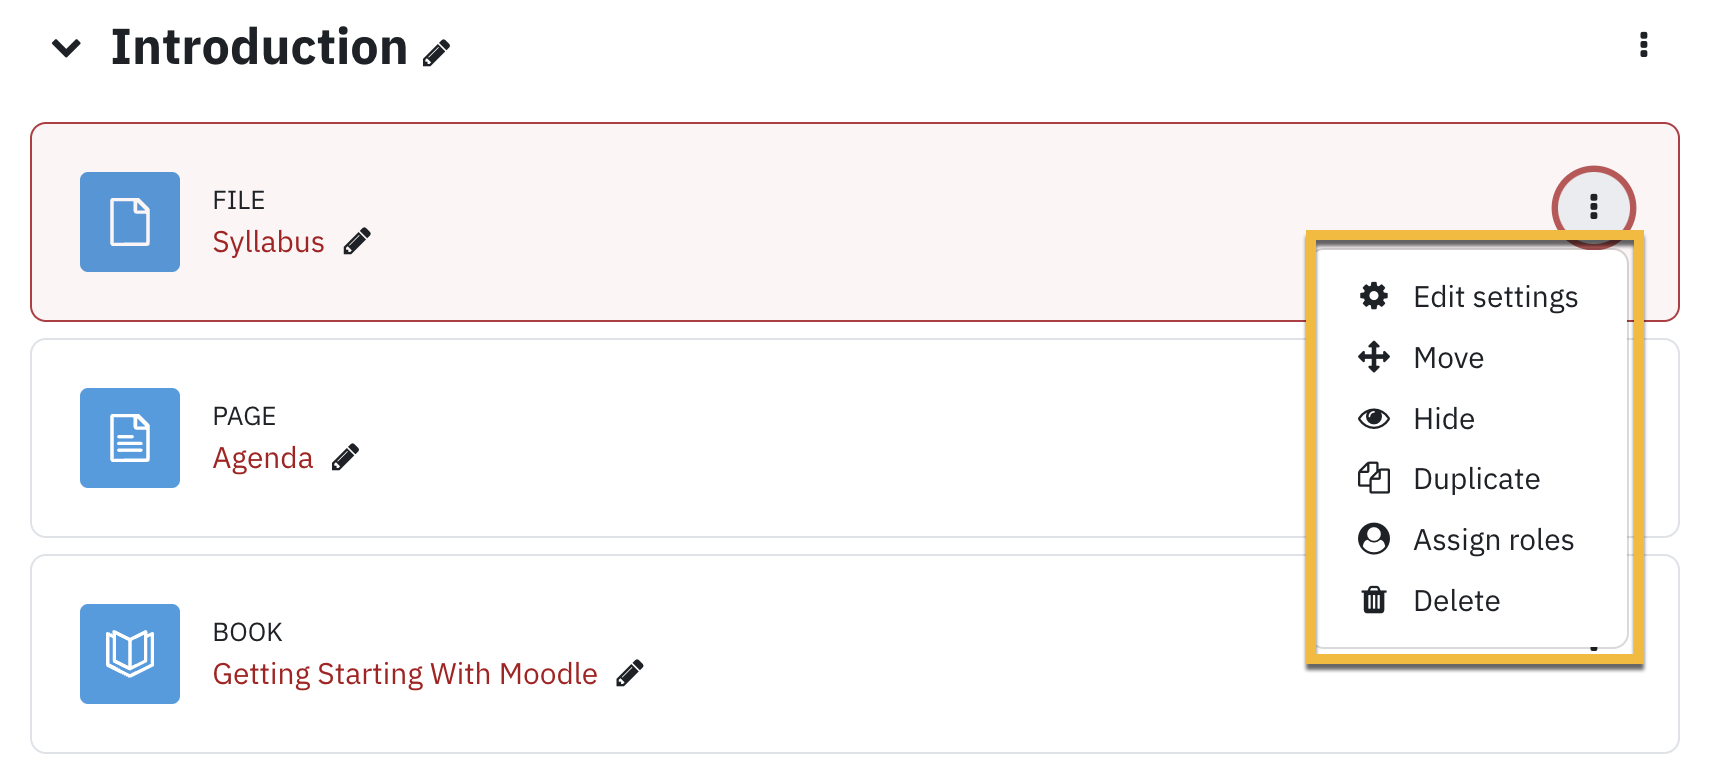
Moving, Hiding, Deleting and Highlighting Sections
With editing turned on, it is possible to rearrange sections and content by dragging and dropping them. Using the Edit menu to the right of each section or item you can hide them from students, duplicate them, delete them.