What is Attendance?
Attendance is a built-in tool that allows instructors to track student attendance for in-person, hybrid, or online courses. It provides an easy way to record attendance statuses and generate reports. Depending on how the instructor has configured it, attendance reports can be viewed by the instructor and the student, and a grade can be assigned. Instructors are able to customize the attendance status descriptions (i.e. present, absent, late, etc.) and the grade associated with each.
Students can view their attendance record and grade (where available) by clicking the Attendance activity link on the main course page.
How to add Attendance to your course
-
Click Edit mode toggle to turn it on located upper right corner of the course homepage.

- Click on the + icon and then select Activity or resource, as you can see on the screenshot below:

3. Select Attendance from the list of Activities and Resources, as you can see on the screenshot below:

4. Enter Name (1), Description (optional - 2), Grade, and adjust the rest of the settings as necessary, then scroll down and click Save and return to course (3) button as illustrated below. The Attendance activity will be added to the course homepage. 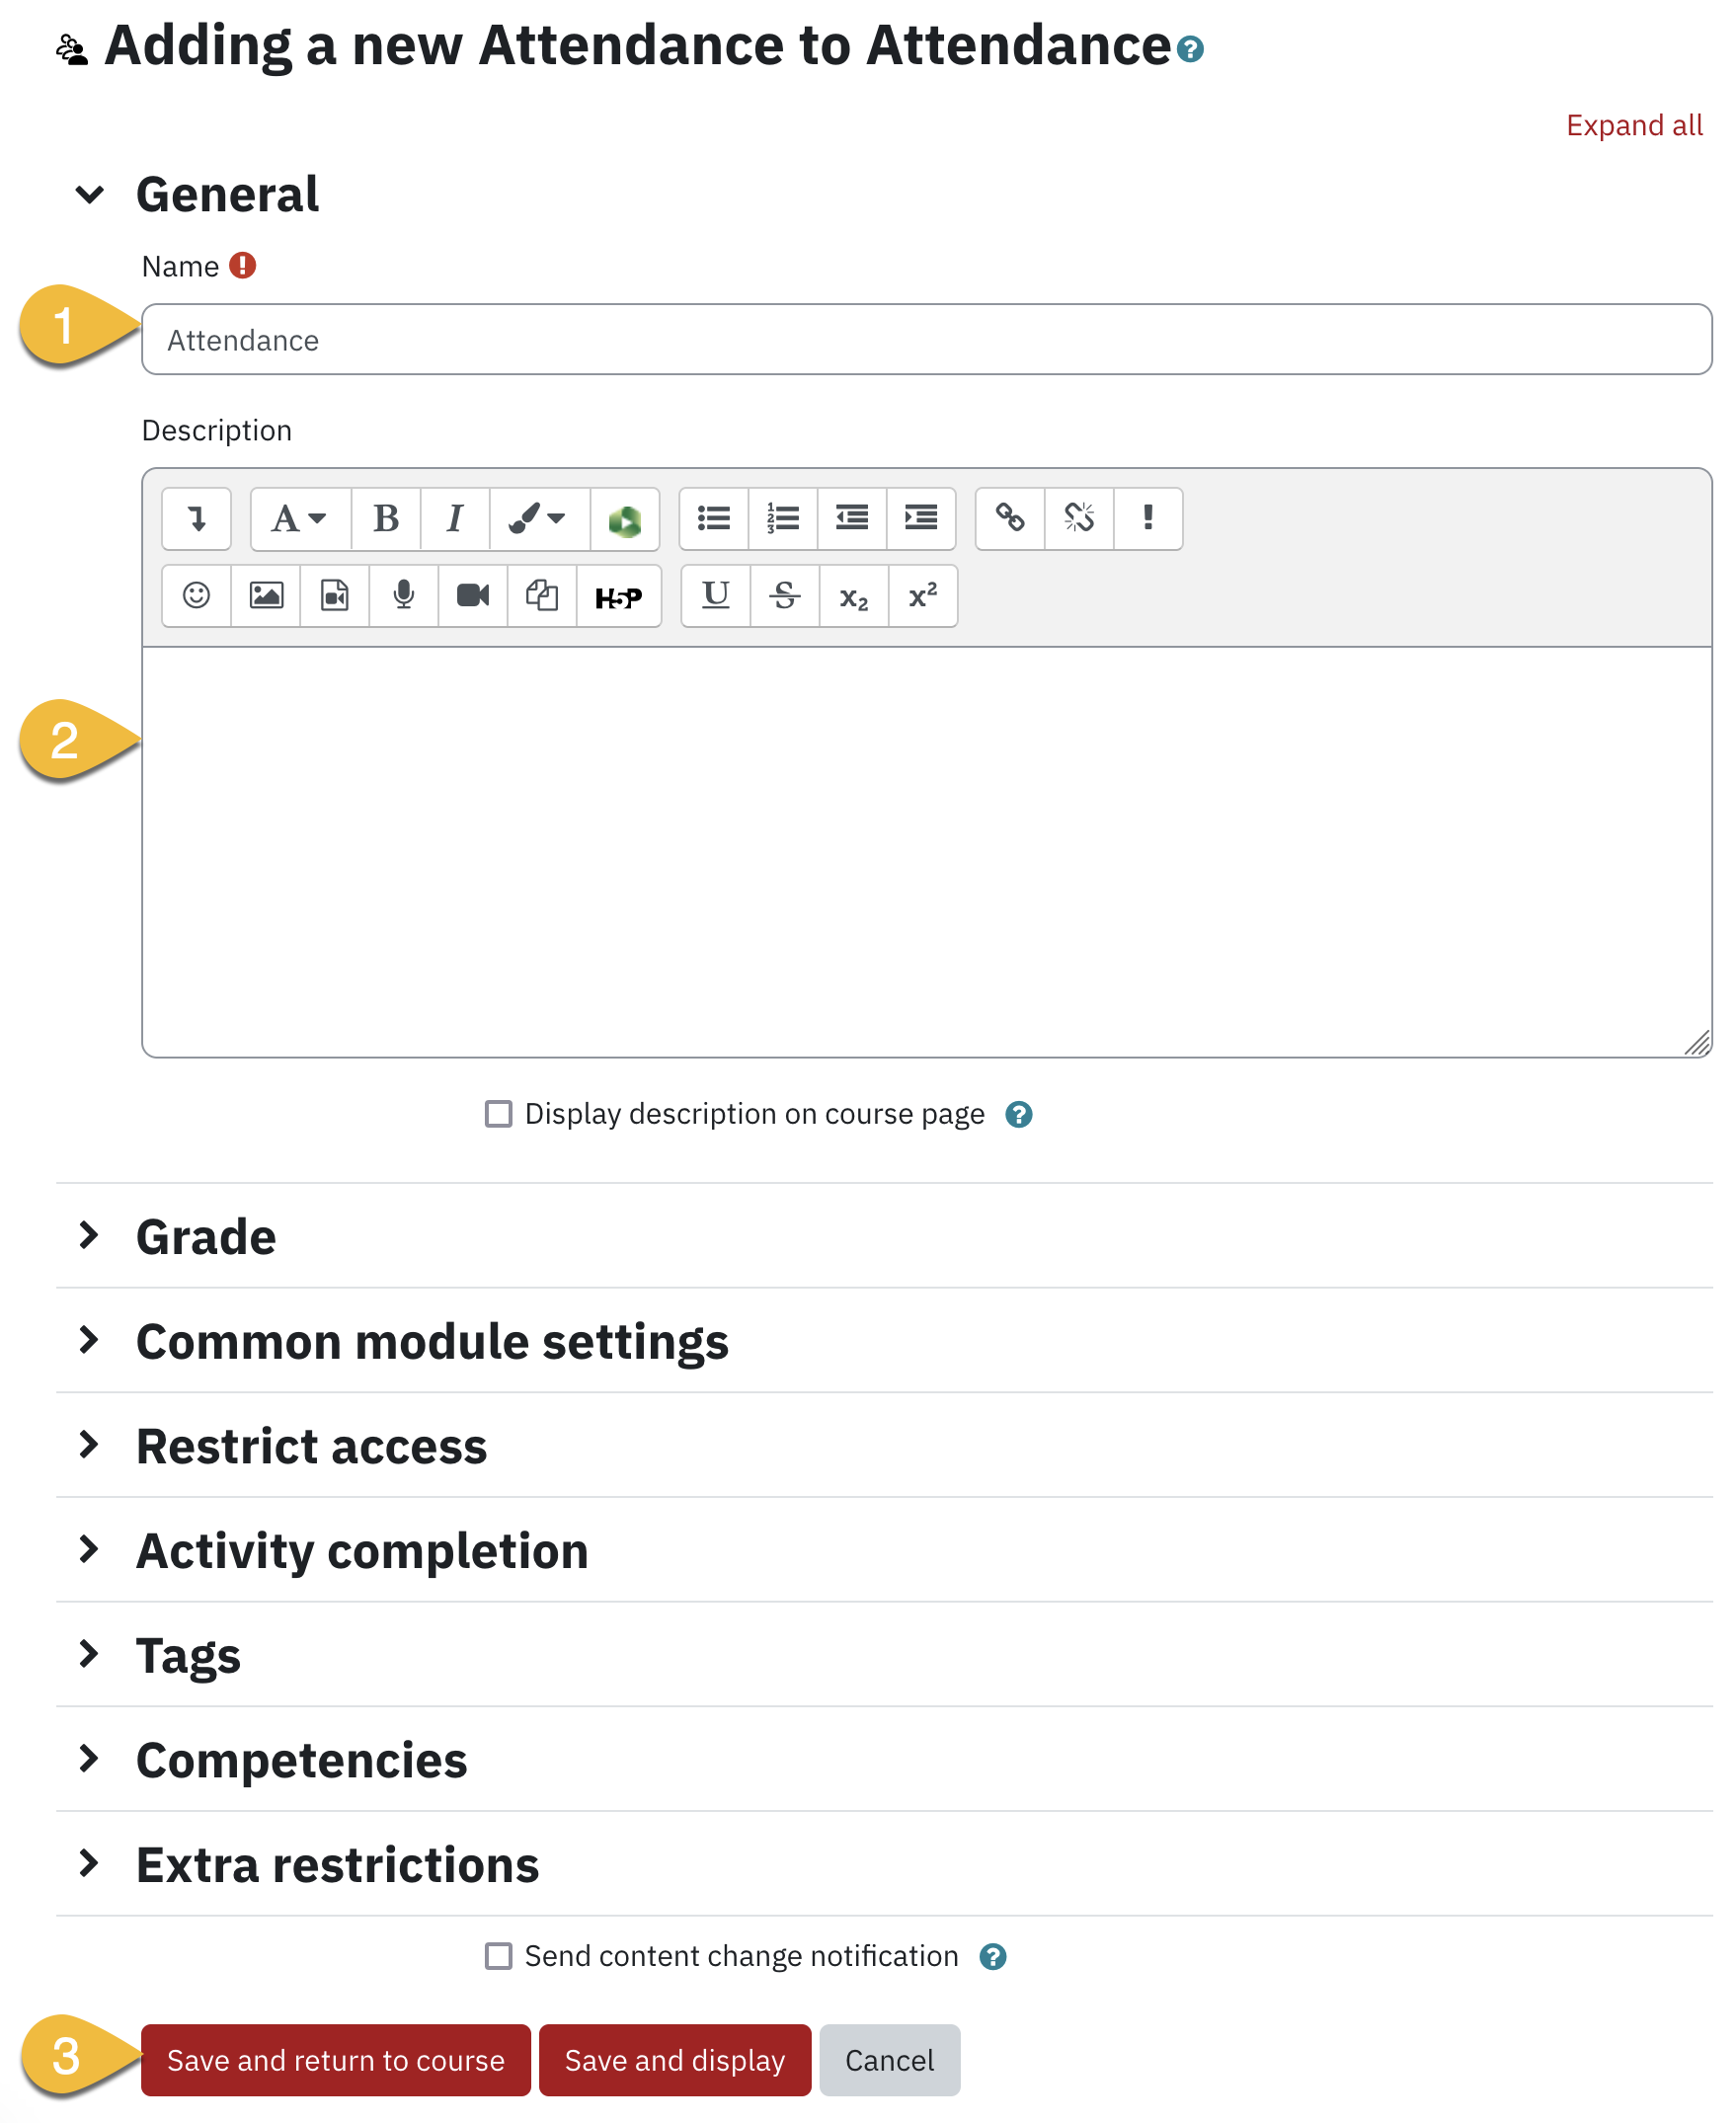
How to use the Attendance activity
Now that you have successfully added the Attendance activity to your course, here is how to use it.
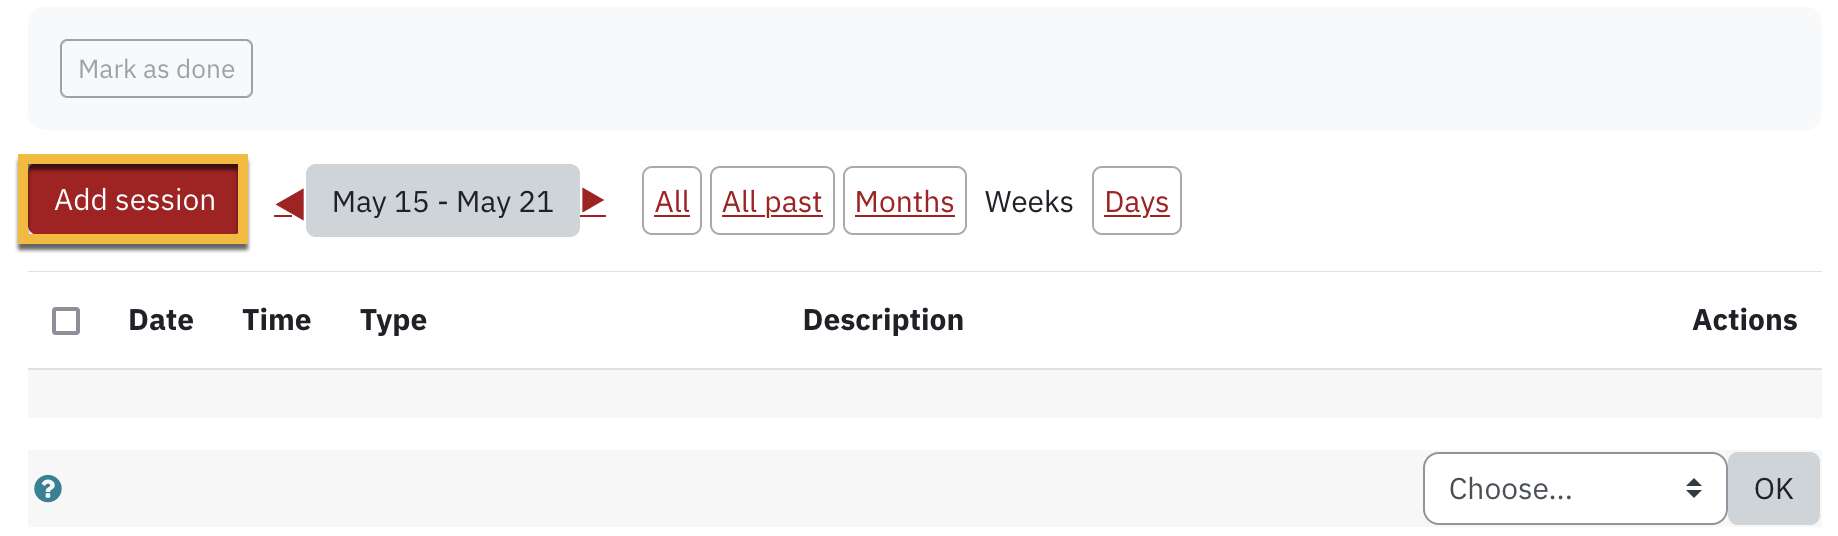
- Click on the Attendance activity you just created. Here you will see an empty list of sessions (as you have not created any sessions yet). In order to create your first session for attendance, go ahead and click the Add session tab, as you can see on the screenshot below:
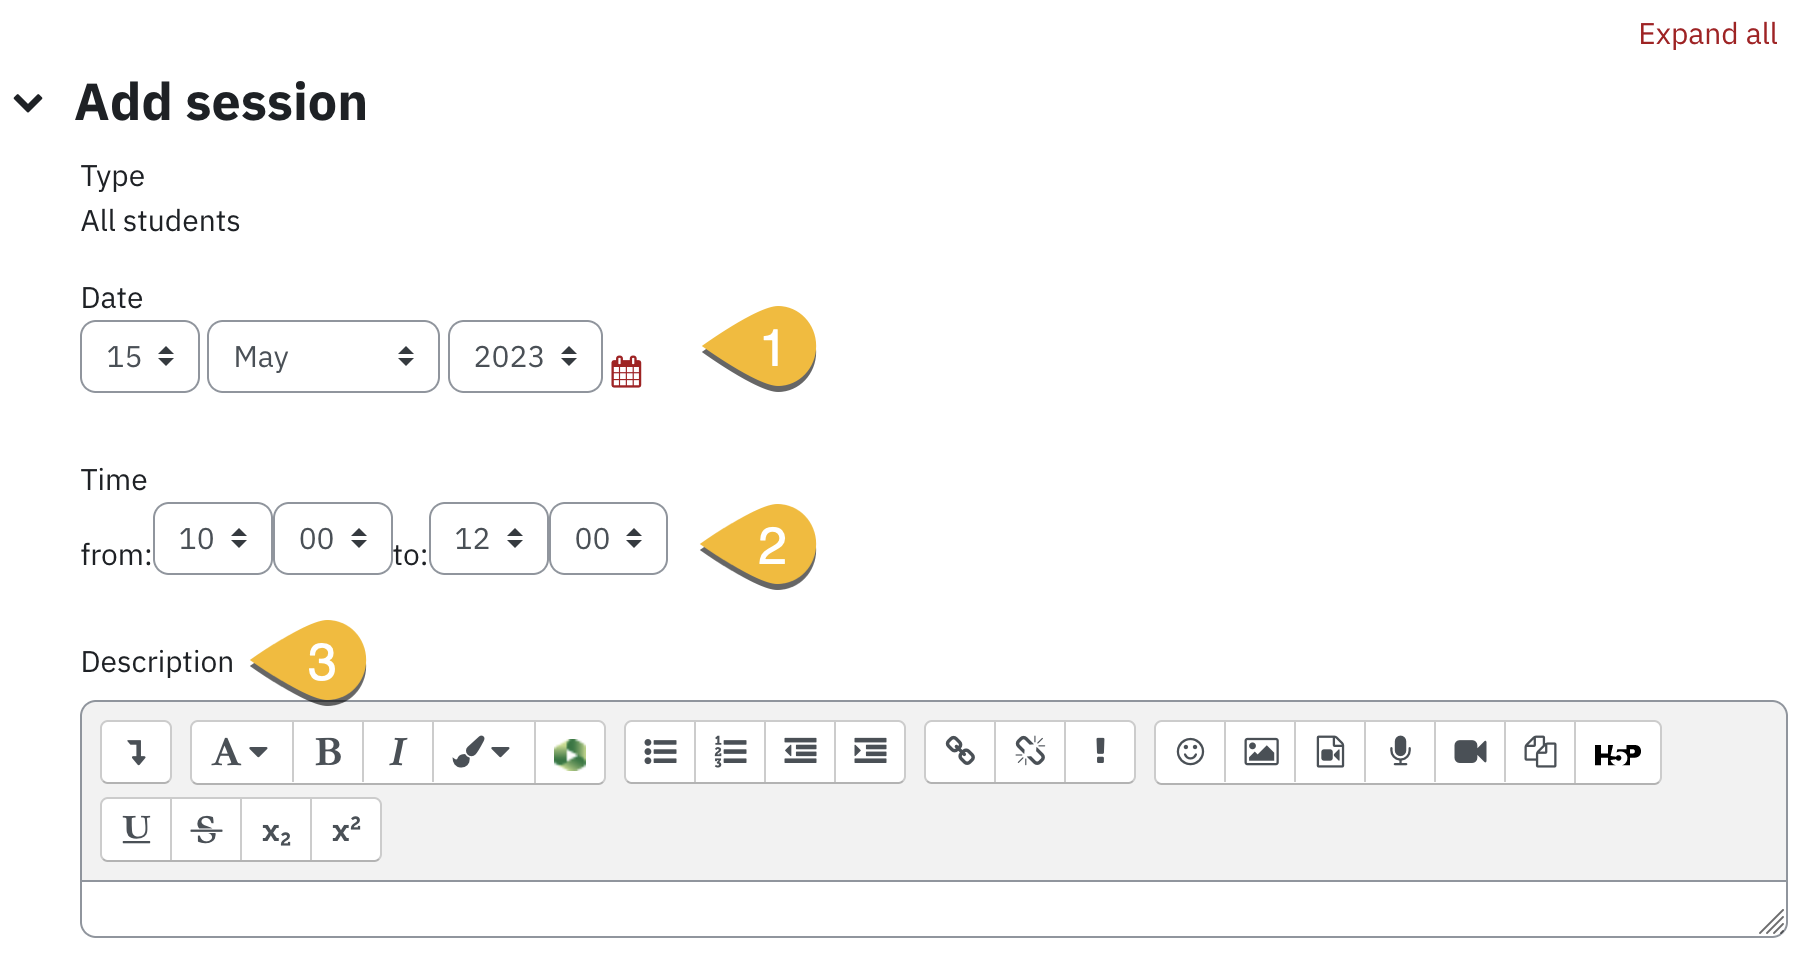
- Now, under the Add session section, you will prompted to enter details such as the Date of the session (1), the time (2) and description (3), as you can see on the screenshot below:
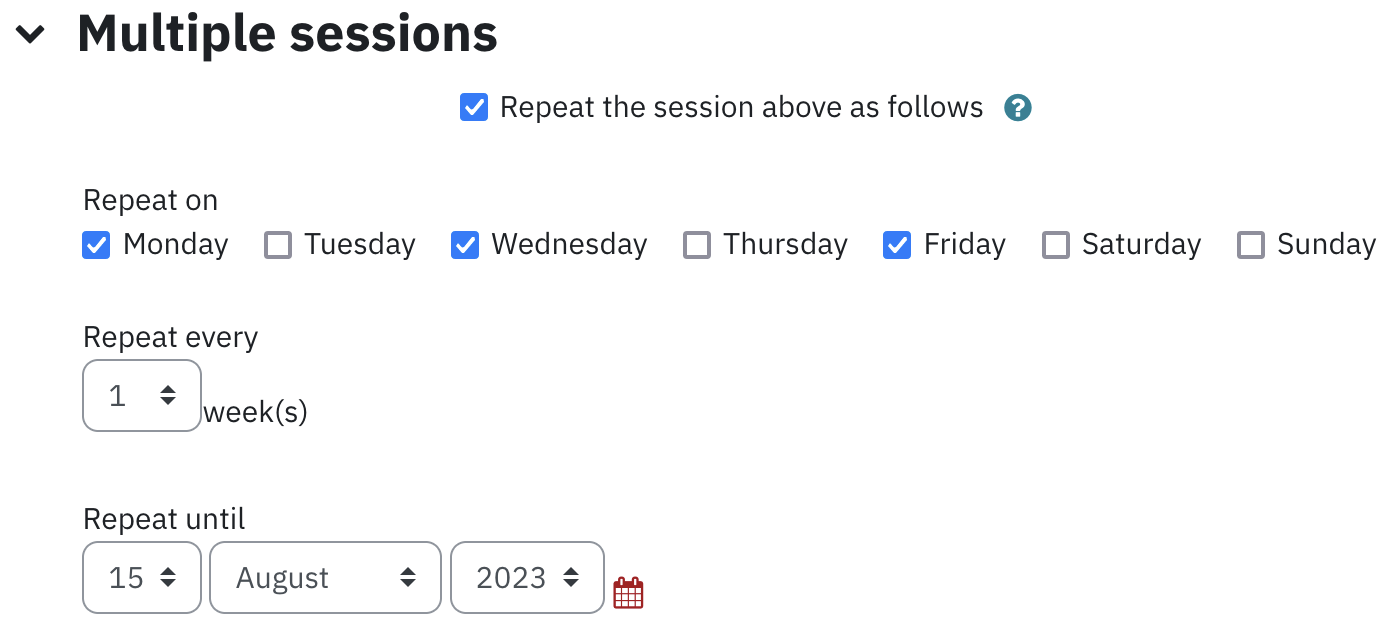
- The section Multiple sessions allow you to repeat the session that you created in step 3 multiple times until a certain date. This is useful as it allows you to create attendance sessions for all your classes at once. in order to enable it, click Repeat the session above as follows, then select the weekdays you want to repeat this session on, and until what date, as you can see on the screenshot below:
- In the last section under Student recording, you can choose to allow students to record their own attendance, as you can see on the screenshot below:

How to take attendance for your students
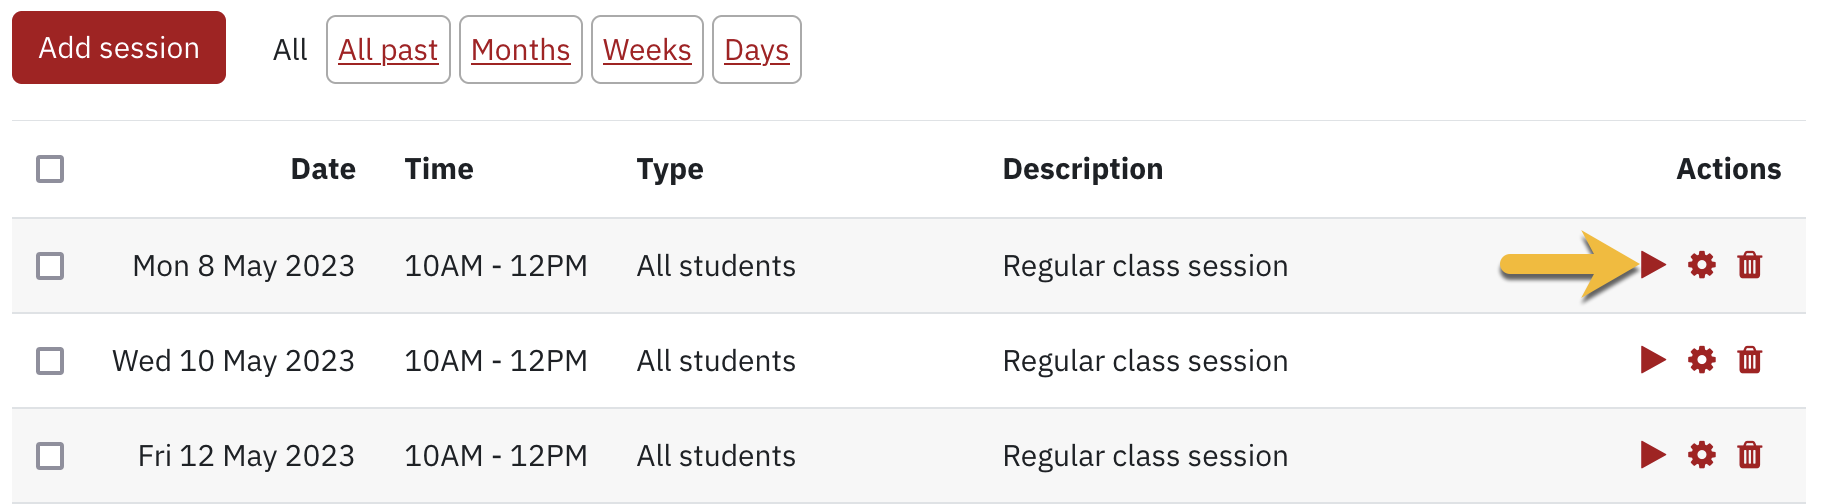
- To proceed and take attendance, go the Attendance activity and Click the red Arrow button in front of the session in order to take attendance, as you can see below:
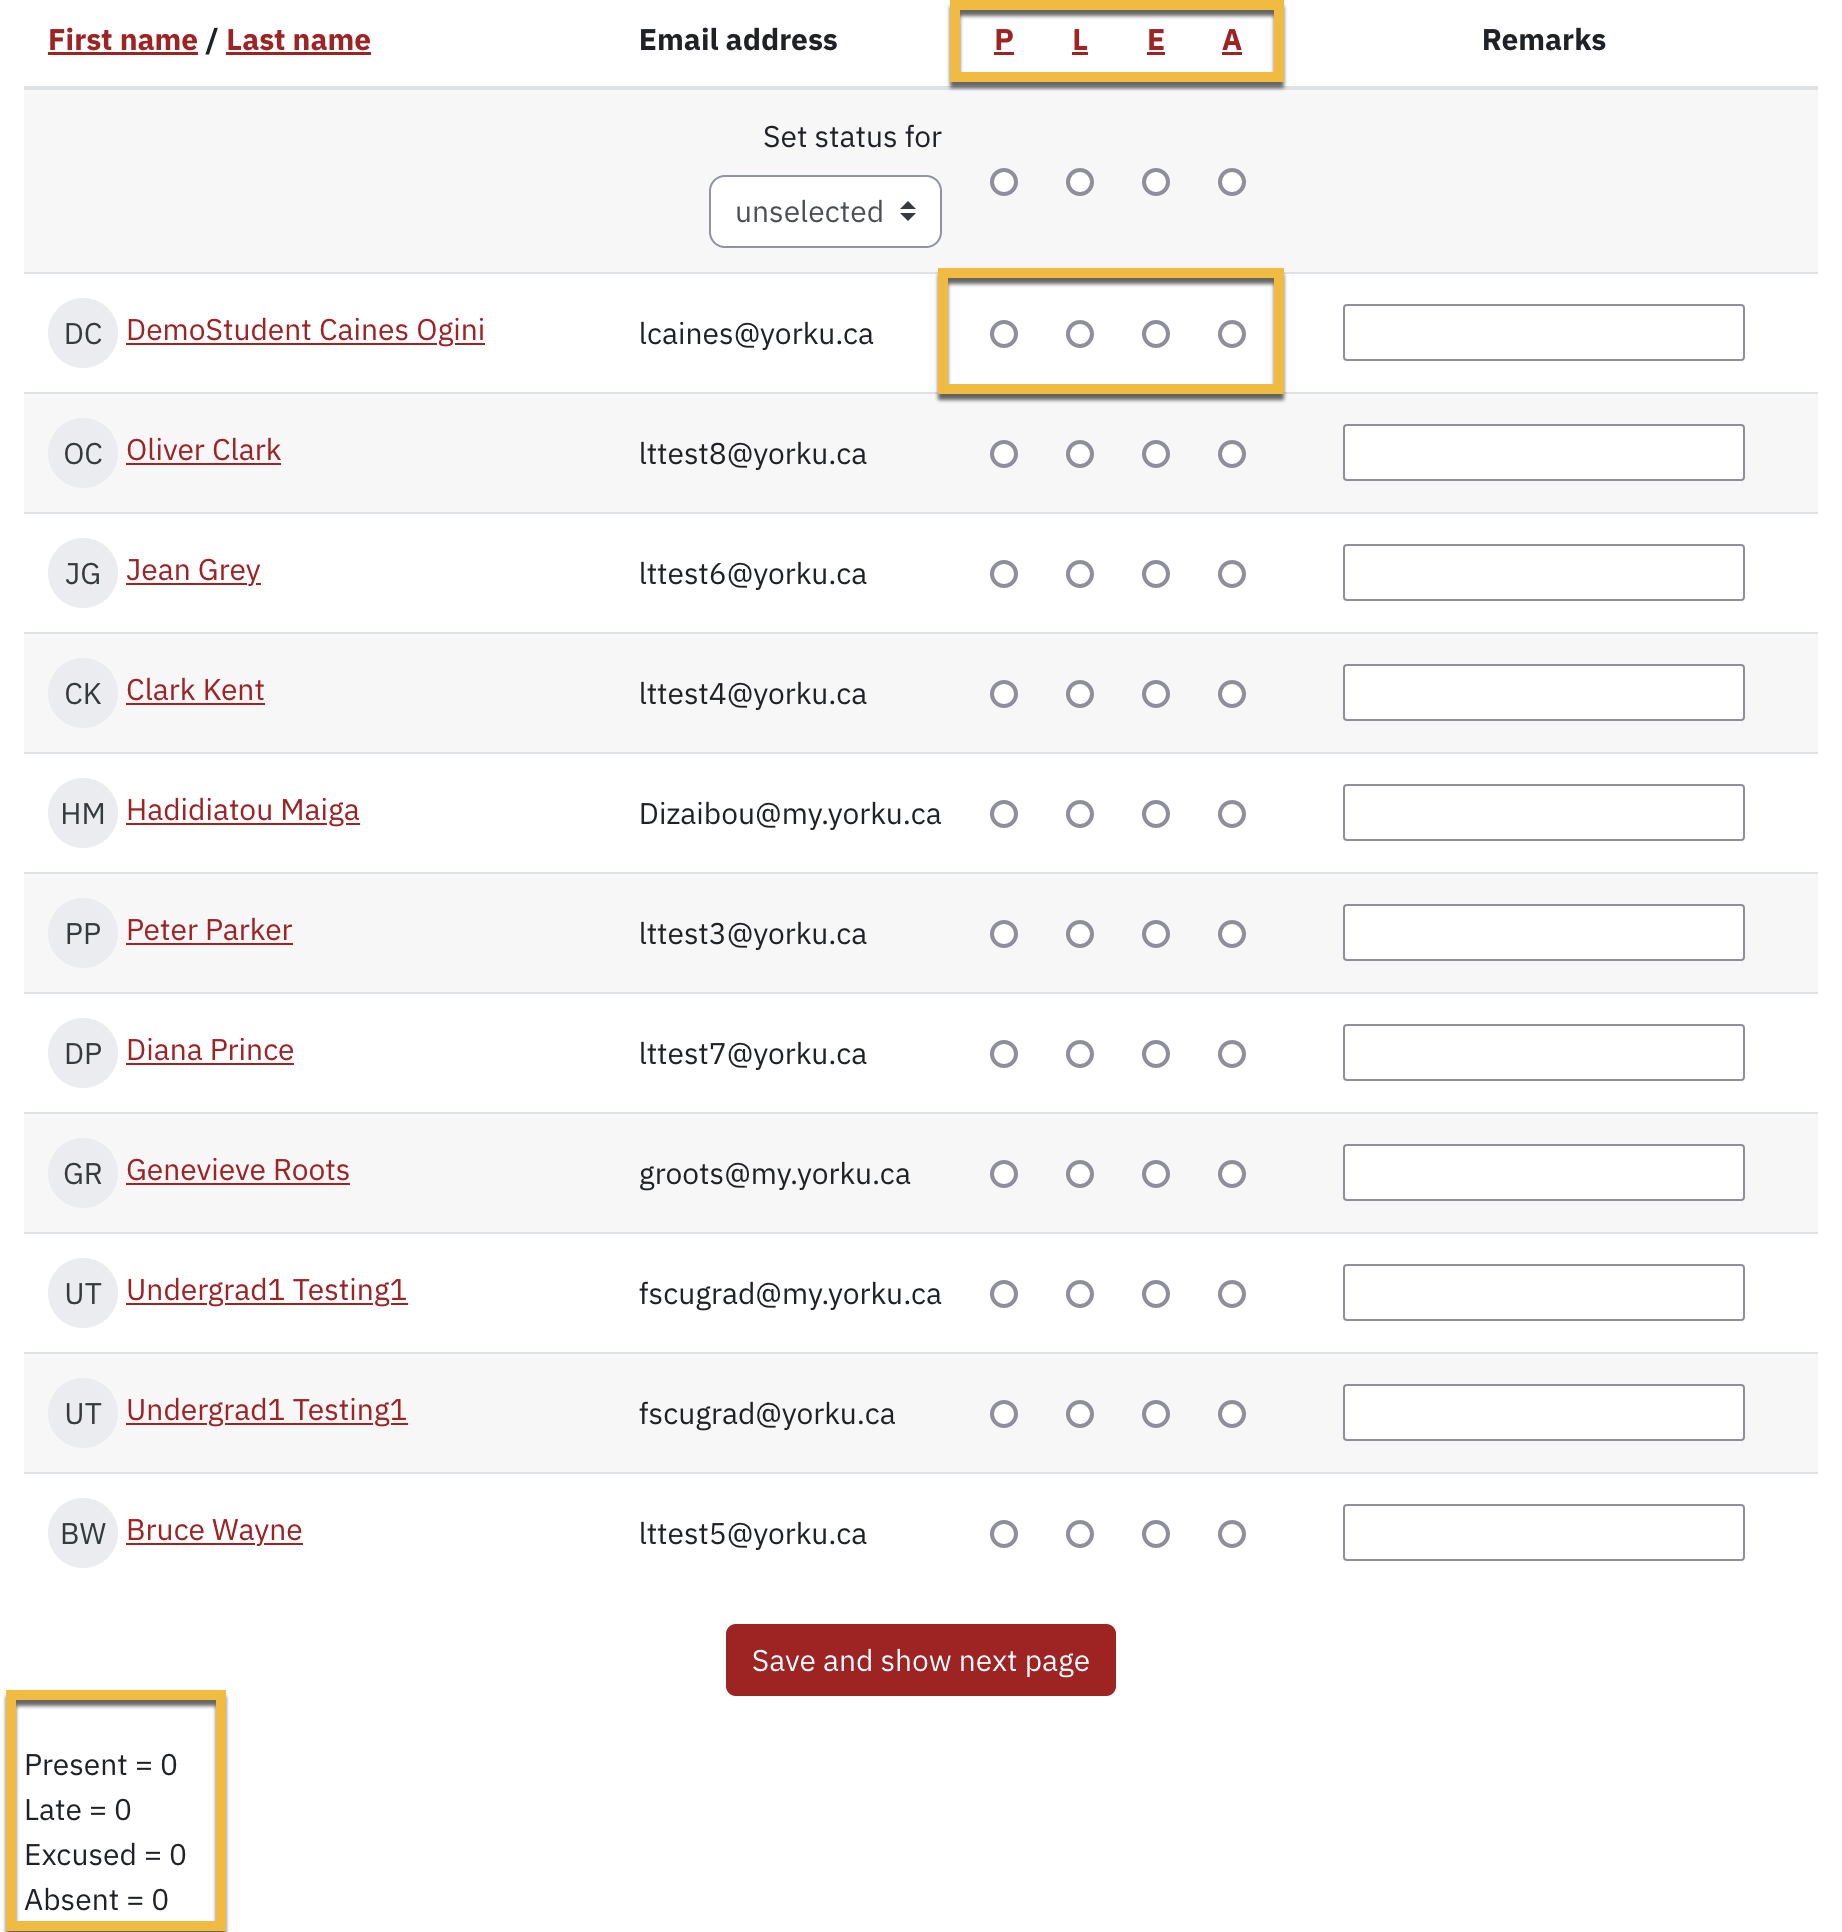
- Proceed and mark your student as Present, Late, Excused or Absent under the corresponding P, L, E, A column.