The eClass Wiki acts as a space where you can work on a project wherever and whenever – collaboratively, or for those writing solo. Eclass Wiki logs all activity which makes it easy to look back on previous versions of the project.
Creating the initial page
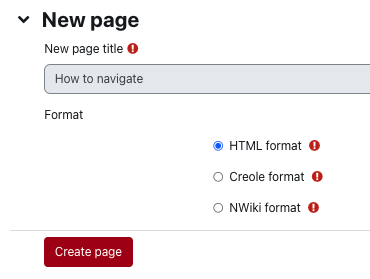
- Click on the title of the Wiki from the course homepage. The Wiki summary will appear; Select the format (default is HTML) and click on Create page button to begin your first page.
- Enter your content into the HTML text editor.
- Select the Preview button to preview the page as it’ll appear on eClass.
- Click the Save button to have your content saved.
Adding an image
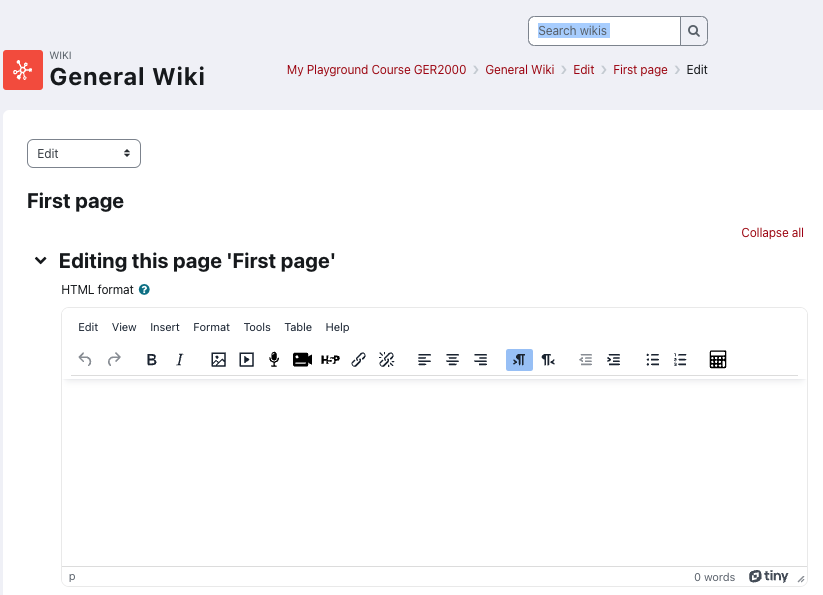
- Click on the title of the Wiki from the course homepage; You'll be taken to preview your Wiki page.
- At the top right of the page, there's a dropdown (default is View) - change that to Edit
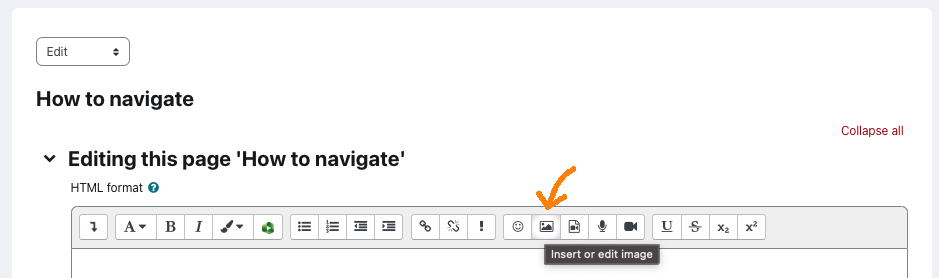
- Click Insert or edit image and then select the image you wish to upload
- Click the Save button to apply your changes.
Editing a page
- Click on the title of the Wiki from the course homepage; You'll be taken to preview your Wiki page.
- At the top right of the page, there's a dropdown (default is View) - change that to Edit
- Using the HTML editor, format text by highlighting it and clicking the desired button in the toolbar at the top of the editing box.
- Select the Preview button to preview your changes, if desired.
- Click the Save button to apply your changes.
Quick tips
- In a group Wiki, click on the Comments drop down option to give feedback to fellow group members.
- To create another page, type the title of your new page within double brackets [[ ]] when editing a page in HTML and save changes. These will create new hyperlinks to the page(s).
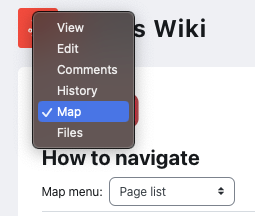
- The Map drop down allows you to view a summary of activities in a Wiki you can click on the Map menu drop-down box to see other options available to you.