Get a sneak peek into what exciting new developments are happening on April 30th. Discover the changes coming your way!
On April 30th you will notice some changes toeClass, this article will walk you through all the changes and how to navigate the site, you'll find things will be easier to access, lets get started!
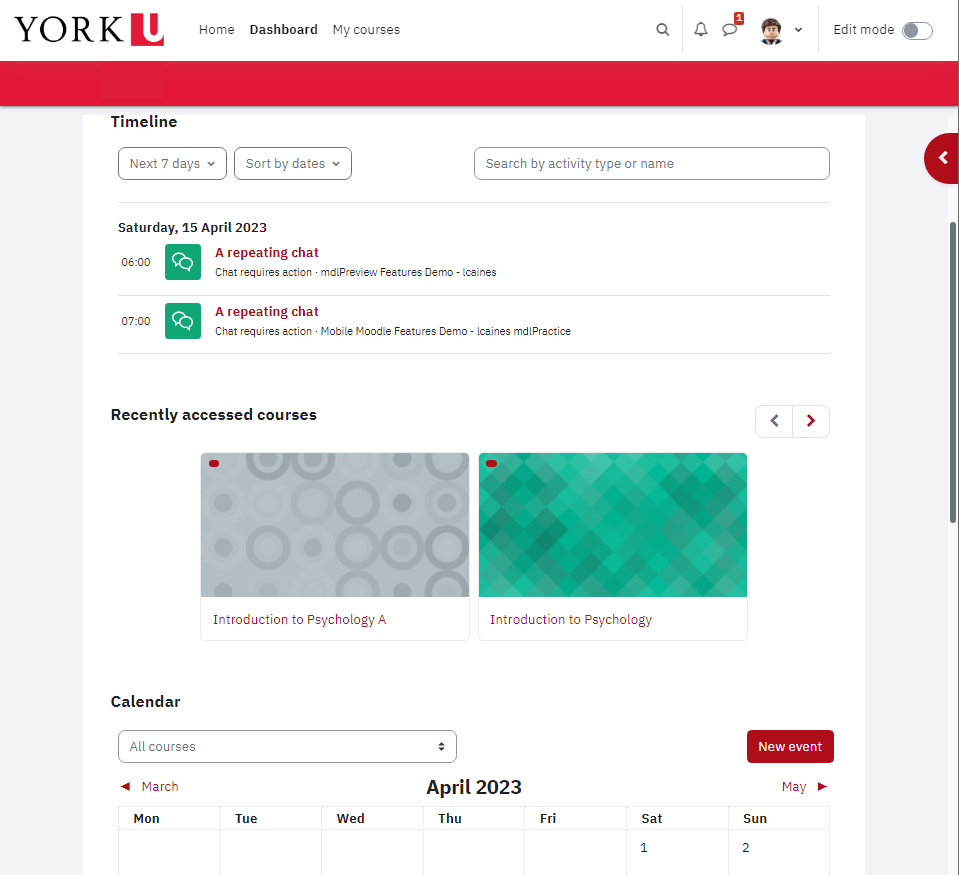
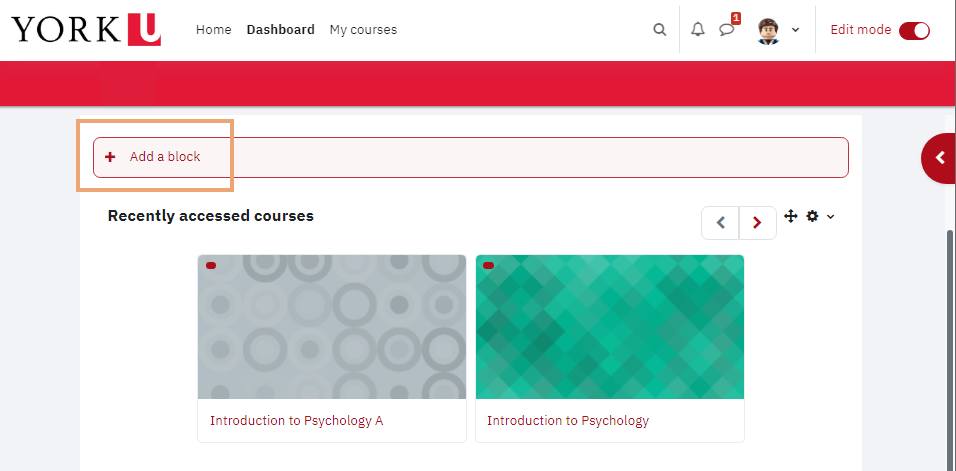
The new Dashboard
When you login to eClass, you'll see the new dashboard. The default view showcases a timeline section, list of recently accessed courses, and a calendar of eClass events and due dates.
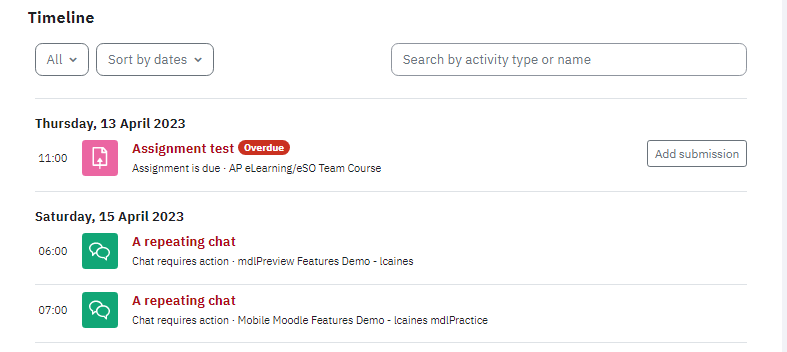
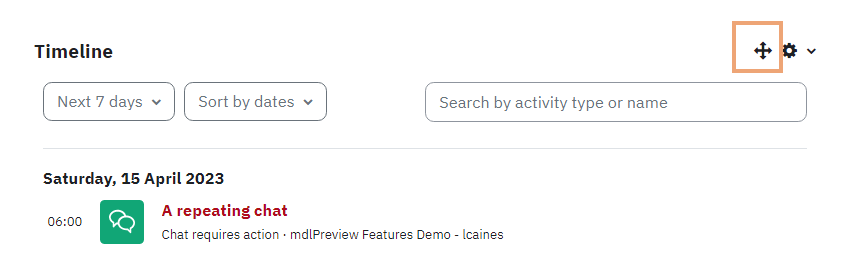
The first section you'll see is a timeline of the activities you need to complete across all your courses so you can stay on track. You can sort this list by dates and activity status, if it is due, overdue, etc. If you don't see this block it means you've modified your dashboard, we'll show you later in this article how to add the timeline to your dashboard.
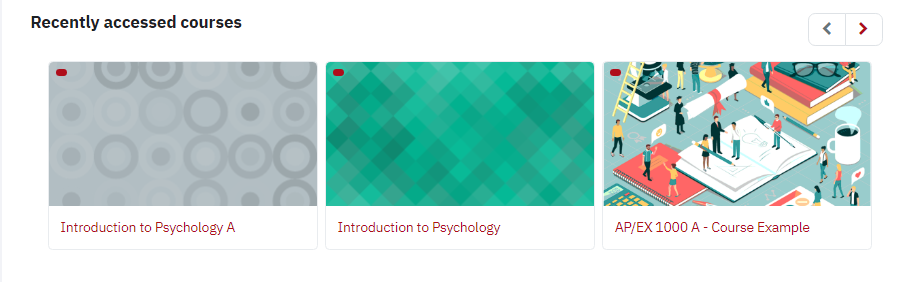
Below you will see your recently accessed courses. To enter a course click on the title.
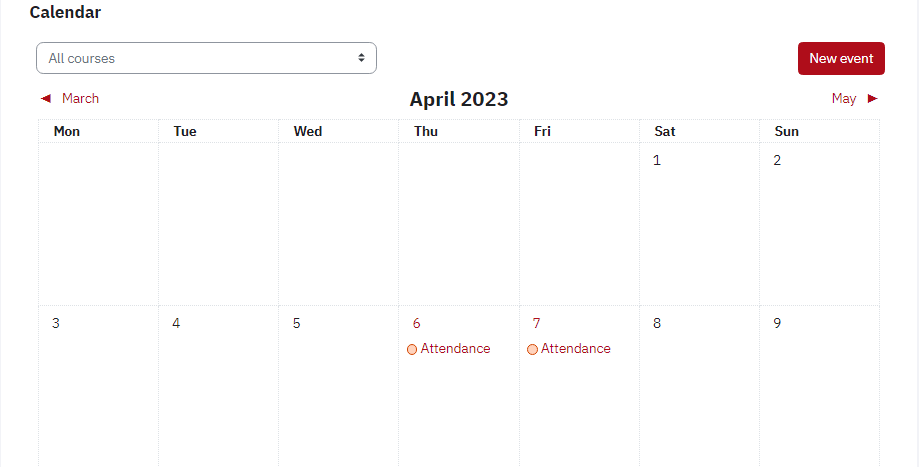
Finally at the bottom of the page, you will see a calendar of your upcoming activities on eClass. You can add your own events to the calendar by clicking on the red New event button on the top right.
Where are my courses?
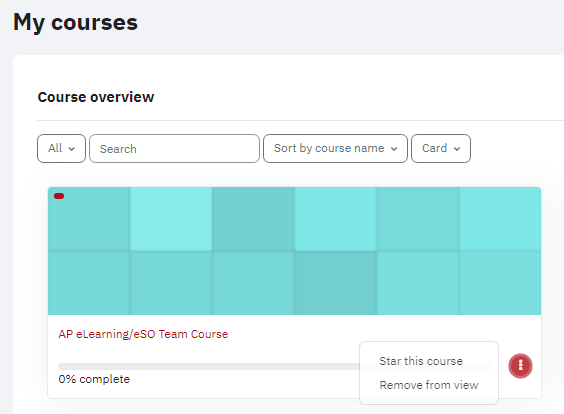
On the top of the eClass site, you will see a couple of menu options. Click on the My courses text, this will take you to a new page with a list of all your courses on eClass that have been made available to you.
You can search or sort these courses by Past, In Progress or Future courses, by name or last accessed, as well as star your favourites, or hide those that you aren't interested in. To enter a course click on the title.
A new look for courses
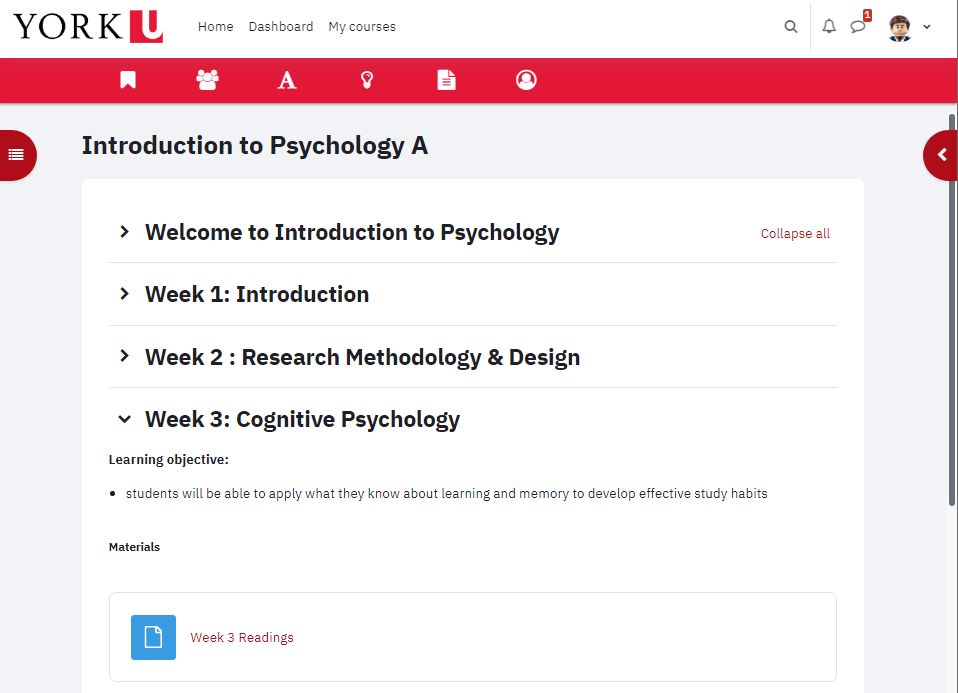
When you enter a course on the new eClass, you will see it looks a little bit different!
Menu Bar
On the top is your menu bar which gives you quick access to some areas of the course, this menu is contextual meaning that as you move through eClass it may change slightly giving you access to items that you need at that time. You can click on Course to return to your course home page at any time.
Course Index
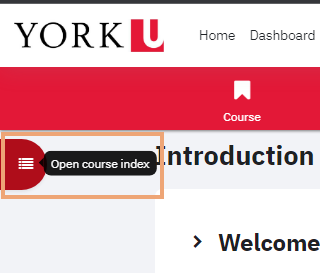
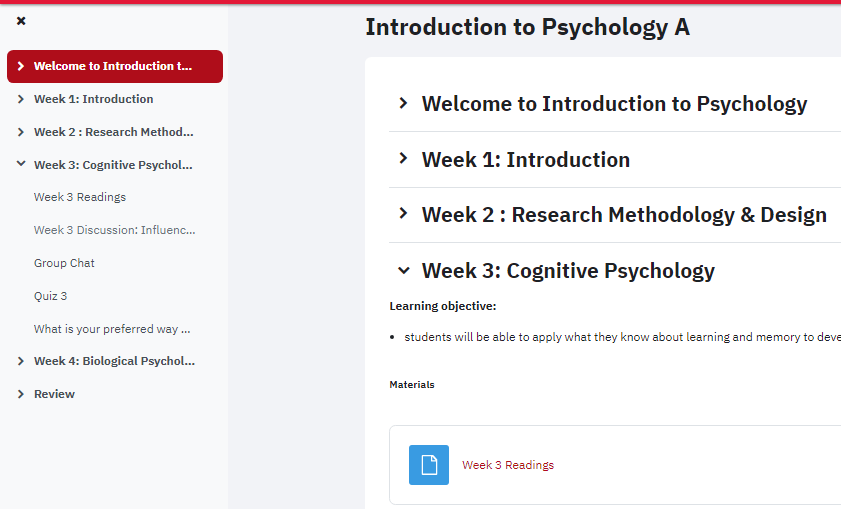
The left side of the page has a button to access a pop out Course Index for quick navigation of the course page and its sections.
So you can quickly and easily skim and skip to areas of the course.
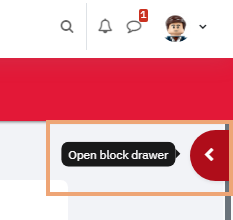
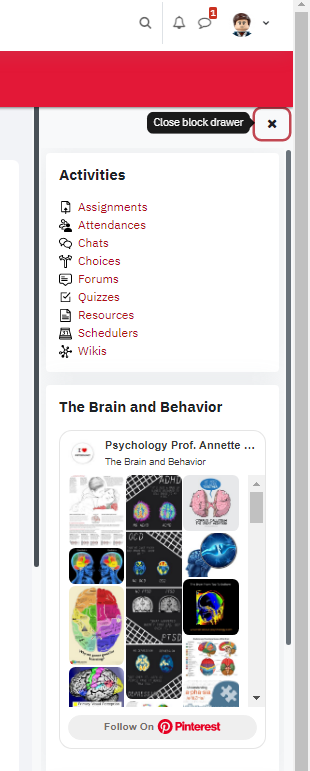
Collapsible Blocks
The right side of the page has a button to access another pop out menu for all the additional course blocks added by your instructor.
These will change course to course, depending on the content your instructor would like to add.
Customizing your dashboard
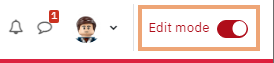
If you'd like to change up the look of your dashboard, or add the timeline block that was missing, you can do so by following these steps. Click the Dashboard text on the top of the eclass site.
Once on your dashboard, you can click the Edit mode toggle on the top right of the page near your profile picture.
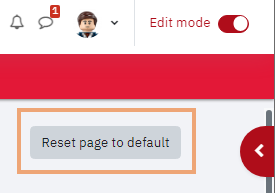
In edit mode, you can choose to revert to the default dashboard layout by clicking the grey Reset page to default button.
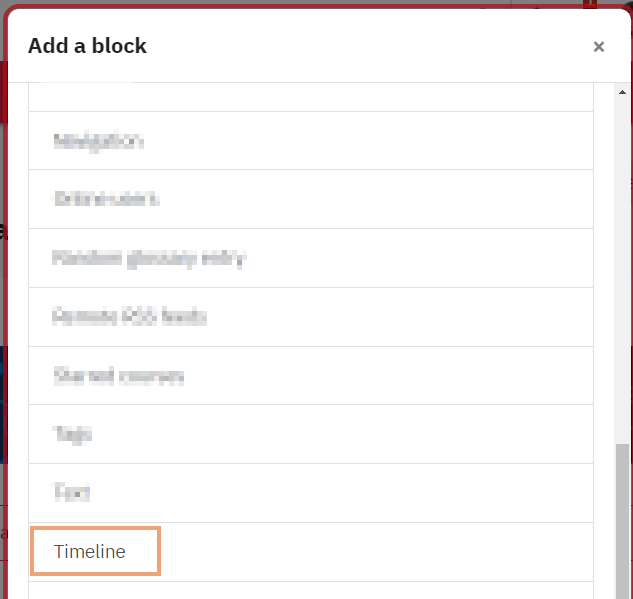
Or you can add a block to your page. To add the timeline block, click the red Add a block button.
Then in the pop up menu, choose the Timeline option, you may need to scroll down as the list is in alphabetical order.
The timeline block will now appear on your Dashboard. You can move a block by clicking and dragging the blue cross arrows on the top right corner of the block.
Tell us how we can make this article better for you?