Turnitin is web-based software which scans submitted works for similarity to material in public websites, academic journals, papers purchased from an essay mill, etc., and to essays and assignments concurrently or previously submitted to Turnitin, which are stored in a database. An 'originality report' is then provided to the instructor, who remains responsible for determining any breach of academic honesty.
Adding a Turnitin assignment to your Course
Once on the course home page, follow the steps below to add a Turnitin assignment in your course:
- Enable Edit mode button in the top right corner of the course home page to add or edit course materials.

- Click Add an activity or resource in the section where you would like the assignment to be listed.

- Select Turnitin Assignment 2 from the list. The Adding a new Turnitin Assignment 2 will appear.

Configuring a Turnitin Assignment
General settings
- Enter a Name and a Summary for the Turnitin Assignment.
- Select the Submission Type.
- The File Upload (default) option will allow uploading file(s).
- The Text Submission will allow students to write/copy the submission inside the text editor.
- The Any Submission Type will allow either of the formats above.
- Select the Number Of Parts (separate uploads) you wish students to submit. For each part you will need to set a Start Date, Due Date and Post Date in the next steps.
Please Note: At any point you may click on the
 to learn more about each setting.
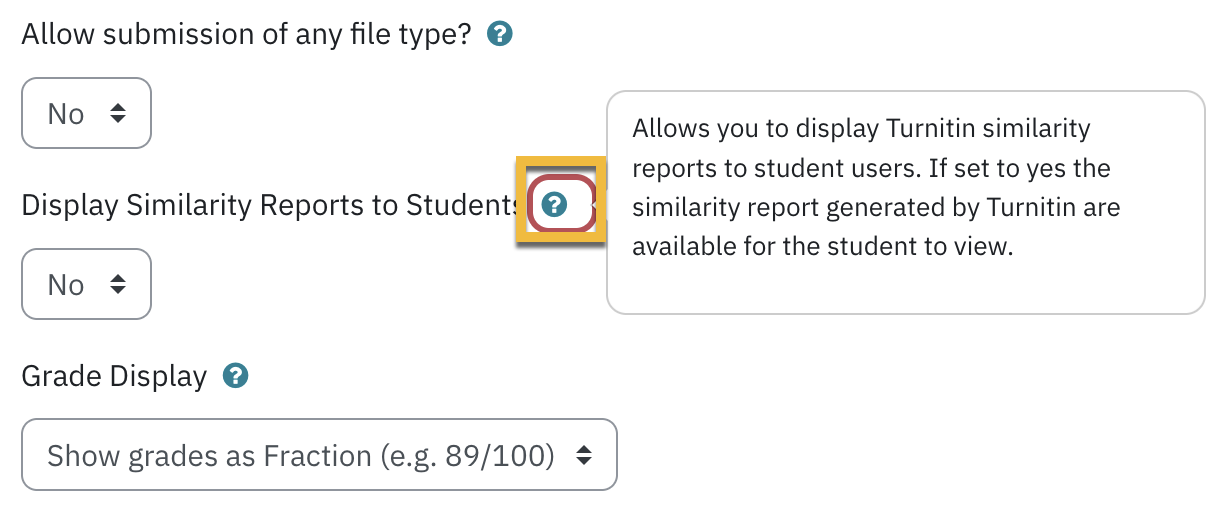
- Select Maximum File Size for submissions for each part, the Site Upload Limit is a good choice. The Maximum File Size will be displayed to students on the submission page.
Files of larger size may be reduced in size by removal of non-text content. Please note that text only files may not exceed 2 MB. If an assignment is set to allow any file type, Turnitin will accept any file that is:- less than 100mb;
- has a minimum of 20 words; and
-
is less than 800 pages
- If set to Yes, Anonymous Marking allows a student's name and any other identifiable information to remain hidden to instructors and teaching assistants while grading. The students' identity is only revealed after the assignment Post date. The student's score is automatically pushed to the course Gradebook after the Post date as well.
Note: If enabled, anonymous marking can not be disabled once a student upload their assignment file.
- If set to Yes, the Allow submission for any file type enables students to submit files in formats not recognized by Turnitin. Where possible, Turnitin will check the originality of text and make it available through GradeMark. Submissions will always be available for download.
-
Grade Display - select whether grade will be displayed as a fraction or a percentage.
-
Auto Refresh Grades / Scores - select whether any changes to grades should automatically sync. If setting this option to Yes slows you down, you can set to Manual but you will need to remember to refresh.
- Set These Values As Assignment Defaults - if you have many similar assignments to create, you may want to take advantage of this option to save the above settings as default. Please note, this only applies to assignments you set up under your own account.
Grade Settings
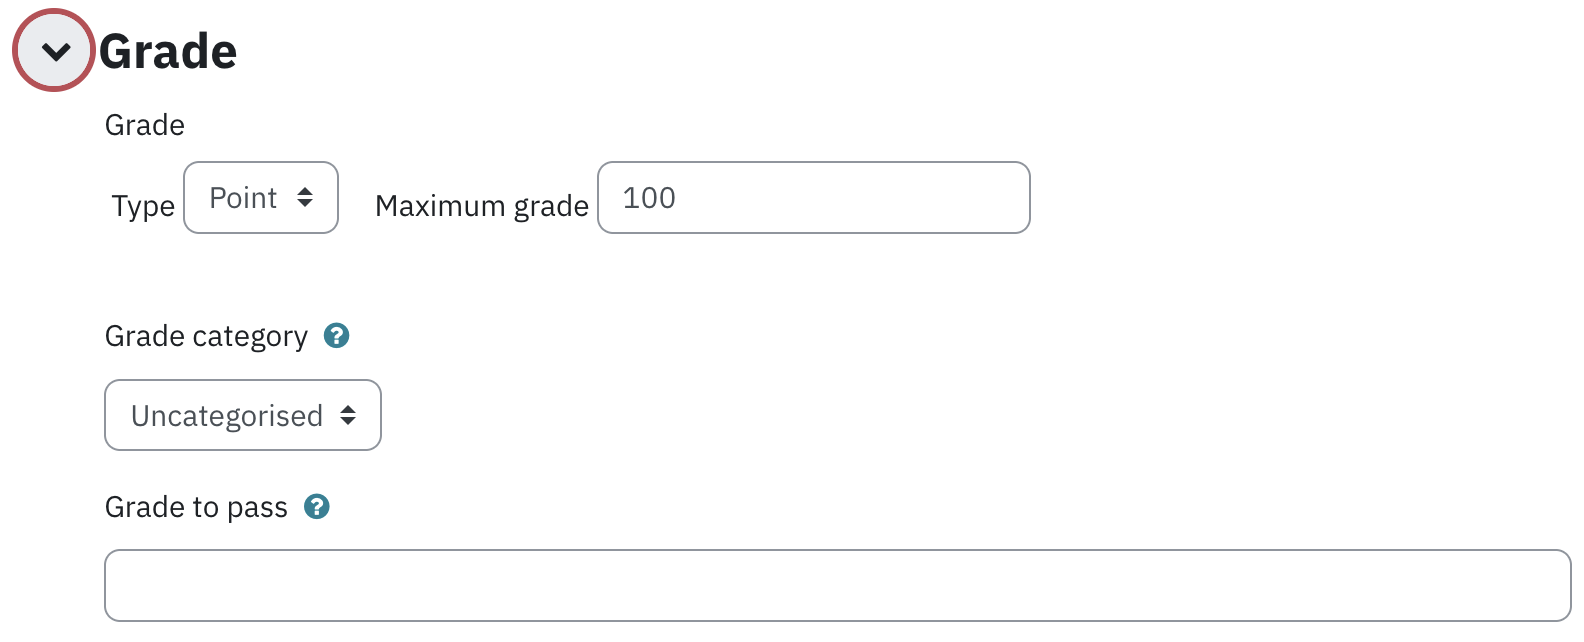
- Set the Grade Type and the Maximum grade for this assignment.
Assignment Part Settings
The number of parts you specified above in the Number of Parts setting determines how many Assignment Part sections will appear. For example, if you specified two parts for the assignment, you will see a section for Assignment Part 1 and Assignment Part 2. Configure each of the parts separately as required.
-
Name - make it clear what you expect students to upload to this part. If you're only expecting a single upload, then something like 'Your work' may be more intuitive than Part 1.
-
Start Date - the earliest date students can submit.
-
Due Date - the deadline. If you have enabled late submissions any late submission will appear in red.
-
Post Date - the date that marks and feedback are returned to students. If you are using anonymous marking, then names are revealed to tutors at this point.

Similiarity Report Options
- Allow Submissions after the Due Date - Select Yes if you would like to allow students to make late submission. The submissions will be marked as late.
- Report Generation Speed- There are three options for generating Originality Reports for student submissions and whether students are able to resubmit their papers:
- Generate reports immediately (re-submissions are not allowed) - Originality Reports for all submissions will be generated immediately. Students cannot resubmit papers. Submissions must be deleted by the instructor to enable re-submission.
- Generate reports immediately (re-submissions are allowed until the due date) - Originality Reports for the initial submission by each student will be generated immediately. Students may resubmit as often as they wish until the assignment due date. However, Originality Reports for any resubmissions after the initial submission are subject to a 24-hour delay. No re-submissions are allowed after the due date and time of the assignment.
Note:- Only the most recent submission is available to the instructor and student.
- This option is typically used for students to self-review and revise their own submissions based on the results of the Originality Report.
-
Generate reports on due date (re-submissions are allowed until the due date) - Originality Reports will not be generated for any submission until the due date and time of the assignment. Students may resubmit as many times as needed until the due date and time without receiving reports. Resubmissions may not be made after the due date and time of the assignment.
- Generate reports immediately (re-submissions are not allowed) - Originality Reports for all submissions will be generated immediately. Students cannot resubmit papers. Submissions must be deleted by the instructor to enable re-submission.
-
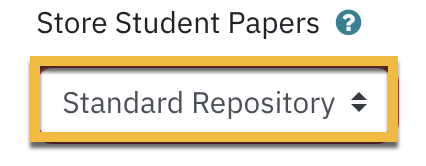
Store Student Papers drop-down list, allows you to select how your student papers are stored. Standard Repository - the default option - stores your students' submissions in the Canadian Turnitin database, which will allow submissions made for other Turnitin assignments to be checked against your class submissions.
- Select the repositories you would like to compare submissions with. There are three database search options: Check against stored student papers, Check against the Internet, and Check against journals, periodicals, and publications.
- Select Yes in the drop-down list(s) as appropriate if you would like to exclude the Bibliography, Quoted material and/or Small Matches from the submission in the comparison.
Grademark Options
- Select an existing rubric from the Attach a rubric to this assignment drop-down list. If you would like to create a new rubric or modify an existing rubric, click Launch Rubric Manager.

Turnitin has detailed instructions on how to create, download, import, and editing using the Rubric Manager on the Turnitin Web site.
Common Module Settings
- Select Hide from Students from the Availability drop-down list if you want to hide the assignment from students. This option allows instructors to control when a resource is available to students.
- Group Mode: Groups are not currently supported for Turnitin Assignments but are noted for inclusion in future developments.
Restrict Access
Restrict access options allow you to set restrictions on an activity or resource by date & time, or by conditions related to previous activities.
Full information about access restrictions can be found here.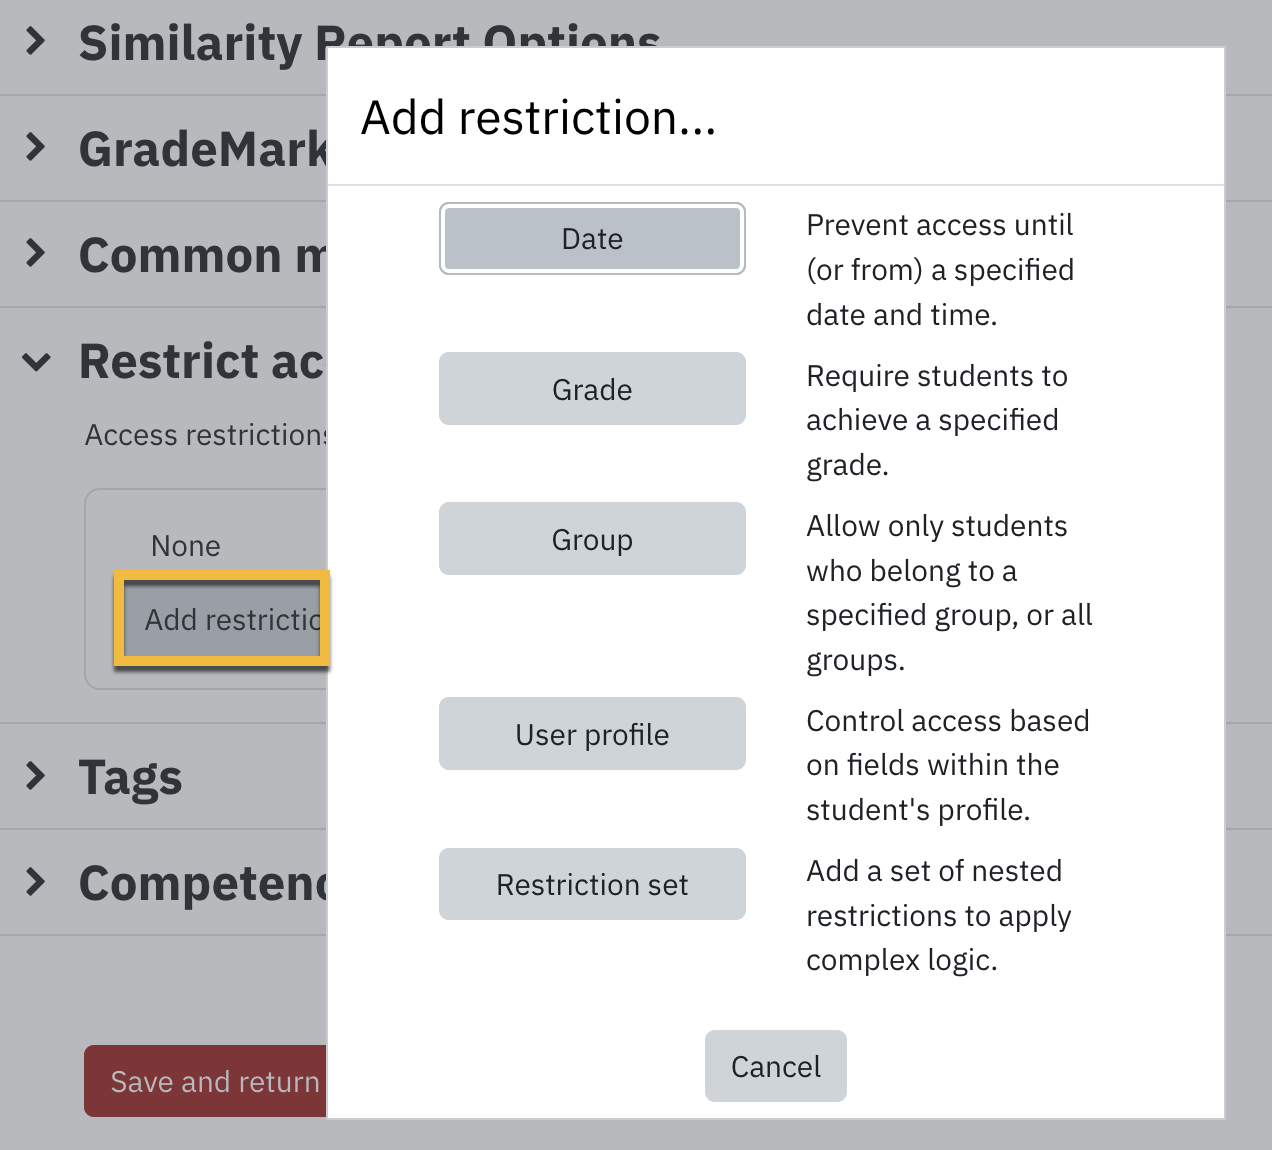
Click Save and display to view the Turnitin Submission Inbox.