Teaching in a Hyflex classroom
A Hyflex classroom is equipped with technology that enables remote students to seamlessly participate in a course that is delivered on campus. The technology installed in the classrooms ensures the two-way engagement of all participants.
Meet your hyflex classroom...

Instructions
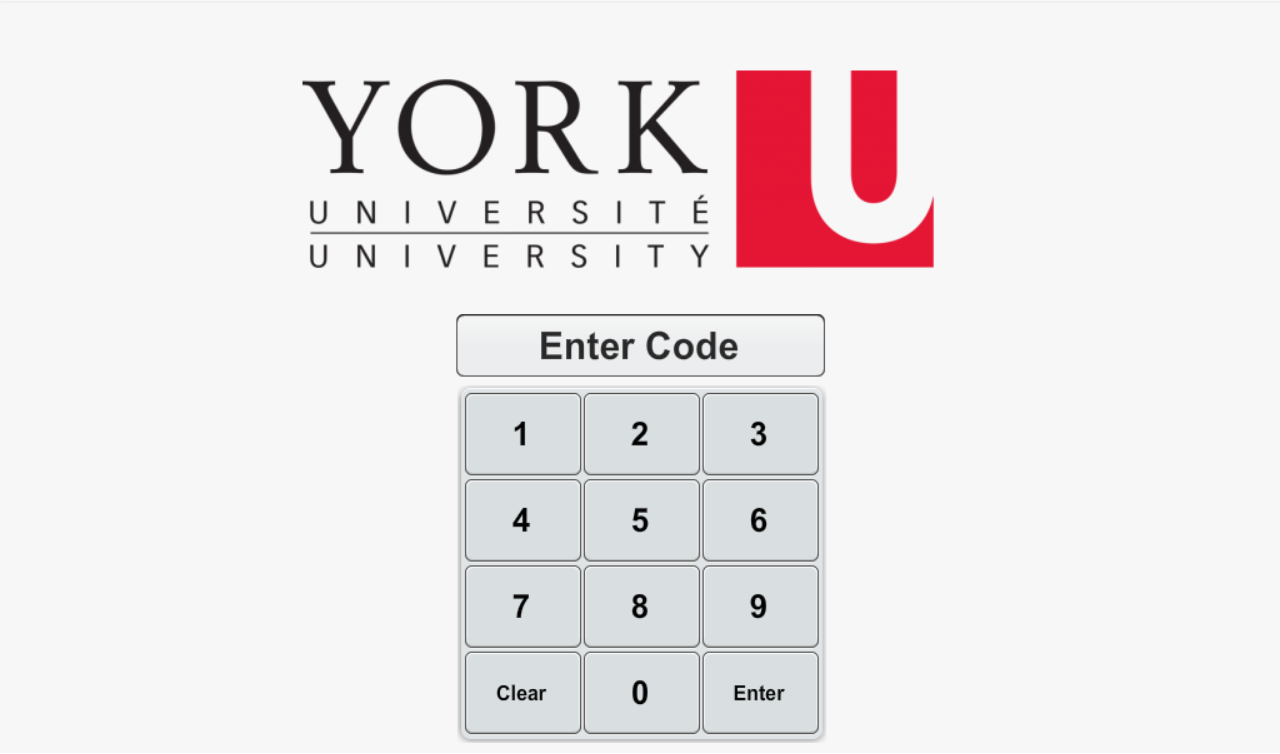
- Unlock the AV control panel and the cabinet in the classroom by using the standard password. (If you do not know the standard password please reach out for help via Live Chat at uit.yorku.ca, by phone (416) 736-5800 or EXT 55800 or email askit@yorku.ca).
- Login into the computer using your Passport York login credentials.
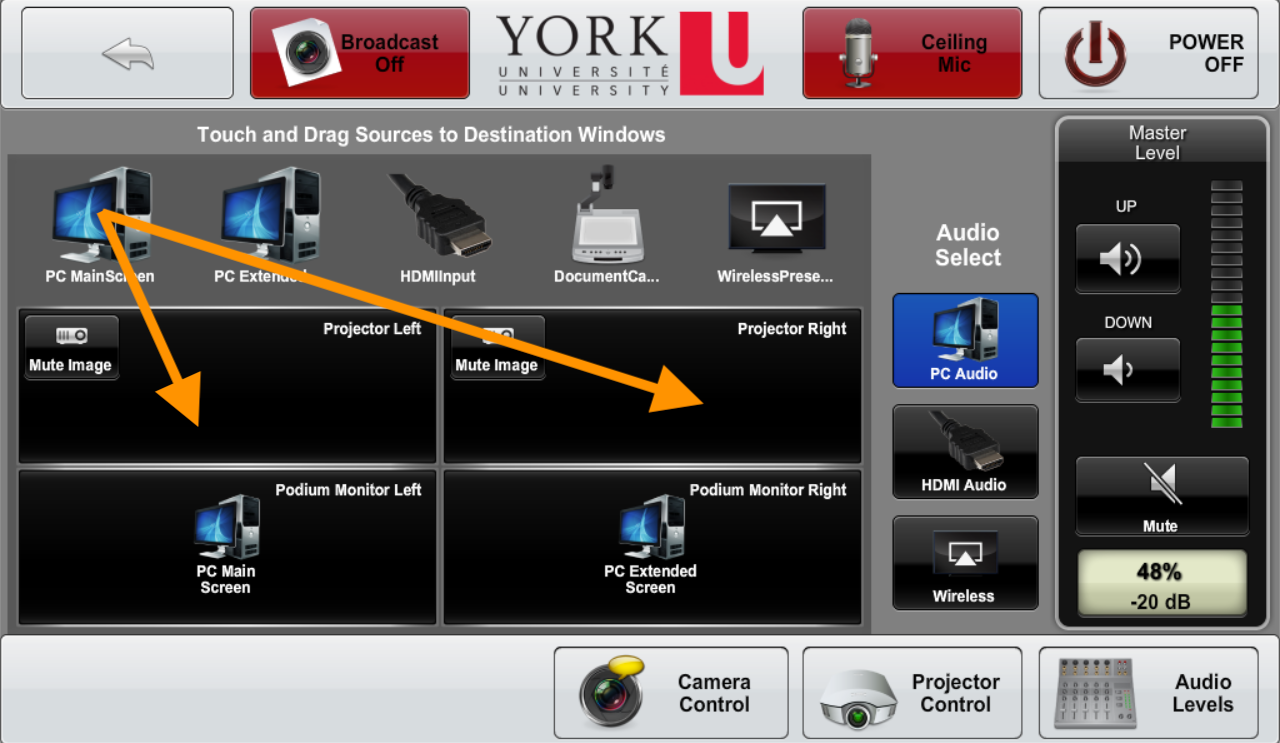
- Open up your presentation, or any content you will be sharing with your students and display them on the screen(s) behind you by using drag and drop on the touchscreen. Most rooms will have two computer screens, a Main screen and an Extended screen (they will be labelled accordingly). You can delegate your preferred screens through the AV control panel's screen. Simply use your finger to drag the computer's screen(s) to the projector(s) you wish to display on. In the example below, the Main screen will be displayed on both the left and right projector screens.
- Launch the Zoom application:
- Be sure to login through the SSO option.
- Start your meeting.
- Touch the Broadcast Off button on the AV control panel. You will then be prompted to say Yes to activate this function. The button is located at the top, middle-left hand side of the screen. Once active, the button will read Broadcast Ready, and will turn green.The Ceiling Mic button will also turn green, to indicate that it is now actively listening. These actions will:
- Display what is showing on your computer screens to the displays on the back wall TV screens. These screens are intended as an extended view for you only. Please be conscious of what is displayed on them, especially if you are setting your class up, and have your email open (for example).
- Start the ceiling microphone. Your remote students can now hear you.
- Start the motion-tracking camera. Your remote students can now see you
- Share your presentation content with your remote participants by choosing Share Screen within Zoom. You can either choose to share the entire desktop or select particular applications like Powerpoint.
- Please remember to record your Zoom meeting if you want to make it available to your students once the class is over.
Tips
- In your Zoom meeting settings, you can set participants to be muted upon entry, this will help avoid distractions as your remote students join.
- Before you start, confirm your remote audience can hear you and see the content you are intending to share.
- Determine with your class how remote students will ask a question during the class. Using the 'raise hand' feature is a good recommendation as it will allow you as an Instructor to easily see who has questions.
- Consider using breakout rooms with your remote audience when you are planning on doing group work in your class. You will need to ensure you mute the Zoom microphone so that remote audience isn't distracted by activities taking place in class (see the Important! notice above). If you want to check in on your breakout rooms with some privacy you could use your phone or laptop to join the meeting as a host and check in on them.
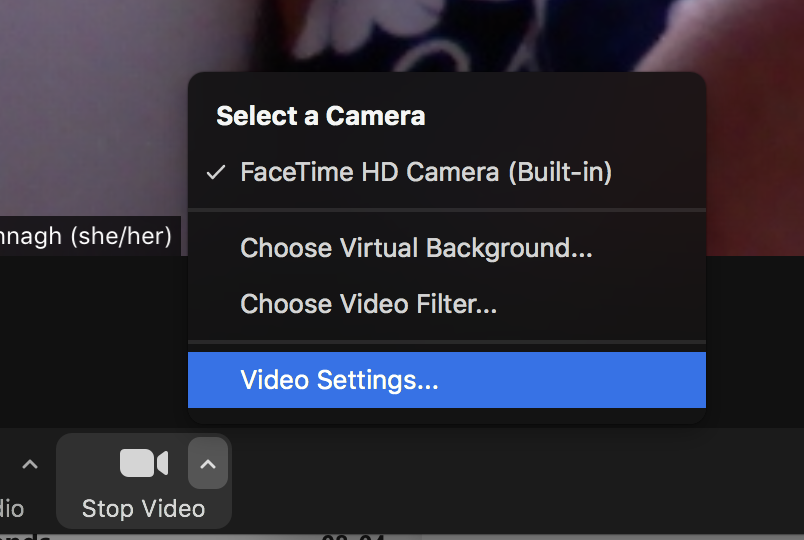
- If you are planning on using the blackboard in your class, you'll need to ensure that the writing isn't backwards for remote participants. If it is, you can go to Video Settings... and deselect 'Mirror my video' (see the image, below):
Using a mobile Hyflex camera in your class

How to get one
Webcam kits can be borrowed from the UIT Service Desk on a first come, first served basis. For more information about how to get one and to view the Lending Policy, visit:
https://www.yorku.ca/uit/techlibrary
Instructions
For detailed instructions please see the Logitech camera's user manual.
Tips
- You can set participants to be muted upon entry through your Zoom meeting settings. This will help avoid distractions as your remote students join.
- Confirm your remote audience can hear you, and see the content you intend to share before starting your class..
- You will need to make sure that your camera is positioned on a sturdy surface. Do not forget that you can use the USB power cable into your laptop instead of the wall plug if you need to position the camera closer to you.
- Determine with your class how remote students will ask a question during the class, using the 'raise hand' feature is a good recommendation as it will allow you as an Instructor to easily see how has questions.
- Consider using breakout rooms with your remote audience when you are planning on doing group work in your class. You will need to ensure you mute the microphone in Zoom, so that remote audience isn't distracted by activities taking place in class. If you want to check in on your breakout rooms with some privacy you could use your phone or laptop to join the meeting as a host and check in on them.
- If you are planning on using the blackboard in your class, you'll need to ensure that the writing isn't backwards for remote participants. If it is, you can go to Video Settings... and deselect 'Mirror my video' (see the image, below):
