Creating Questions Within the Quiz
Follow the steps below to create a question in a quiz.
- Click the Quiz title on the course main page
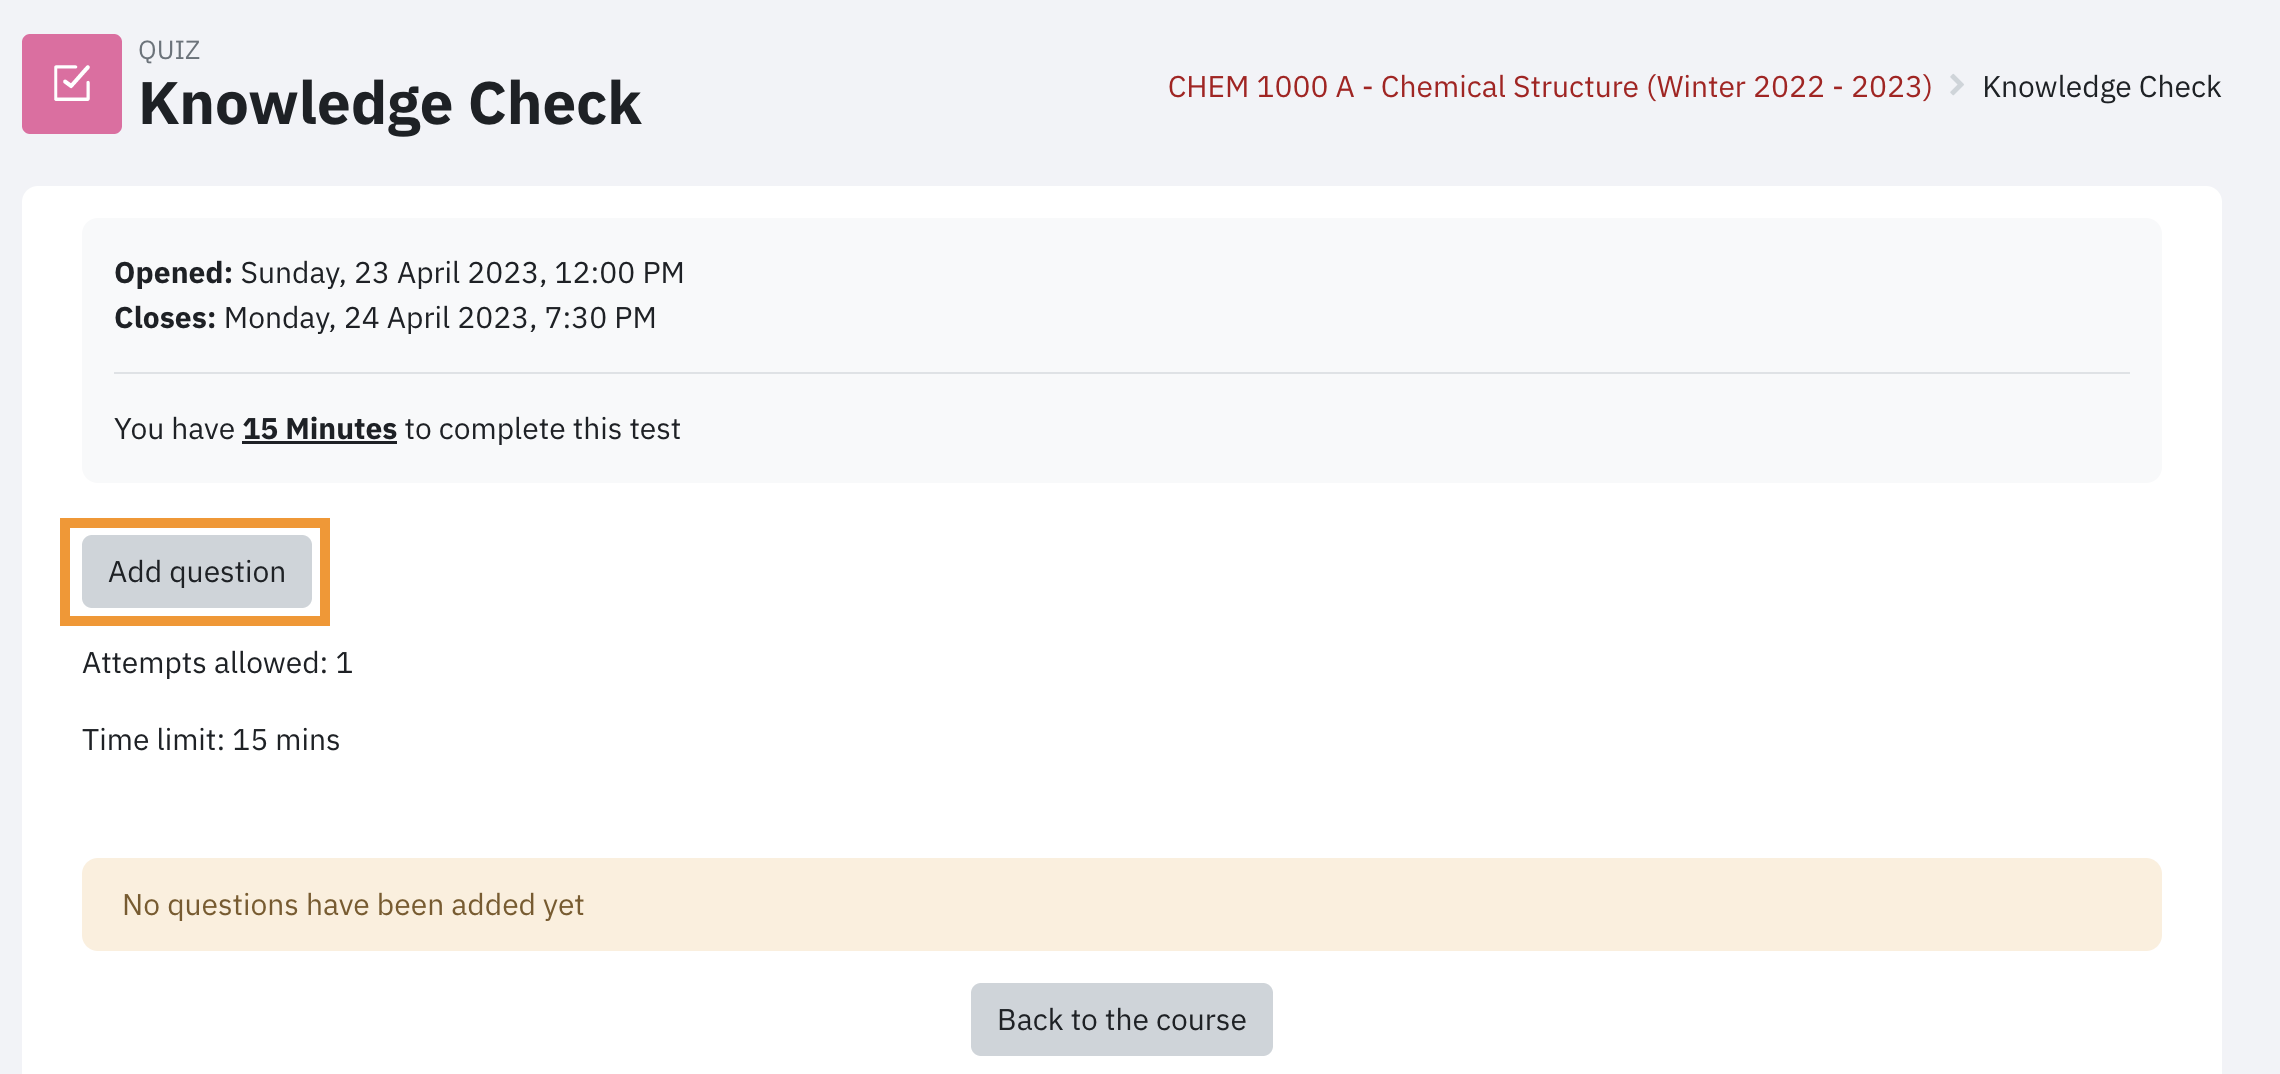
- Click on Add question
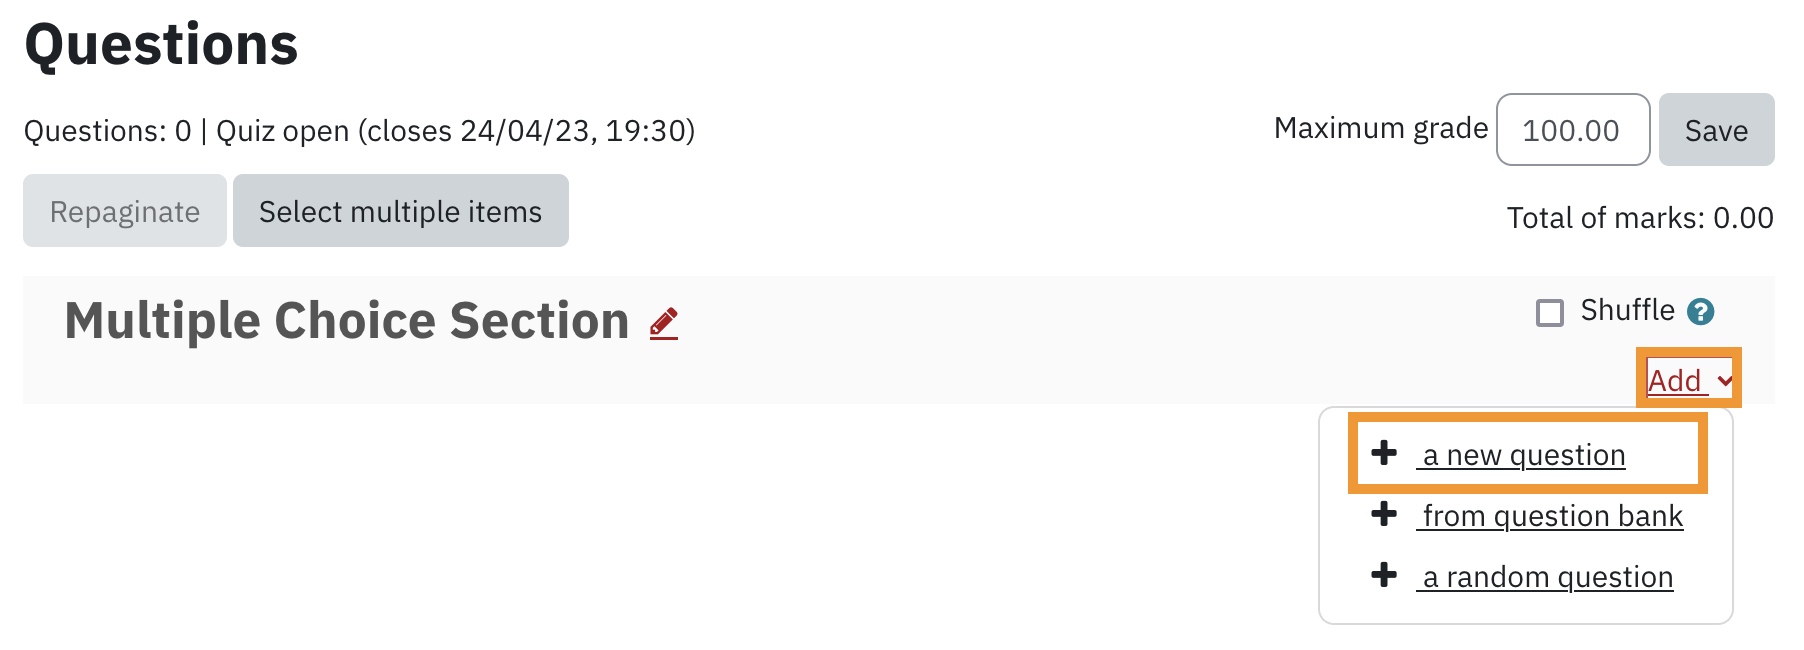
- Click on Add link
- From the drop down menu select a new question
- Choose the type of question you would like to add from the pop-up window.
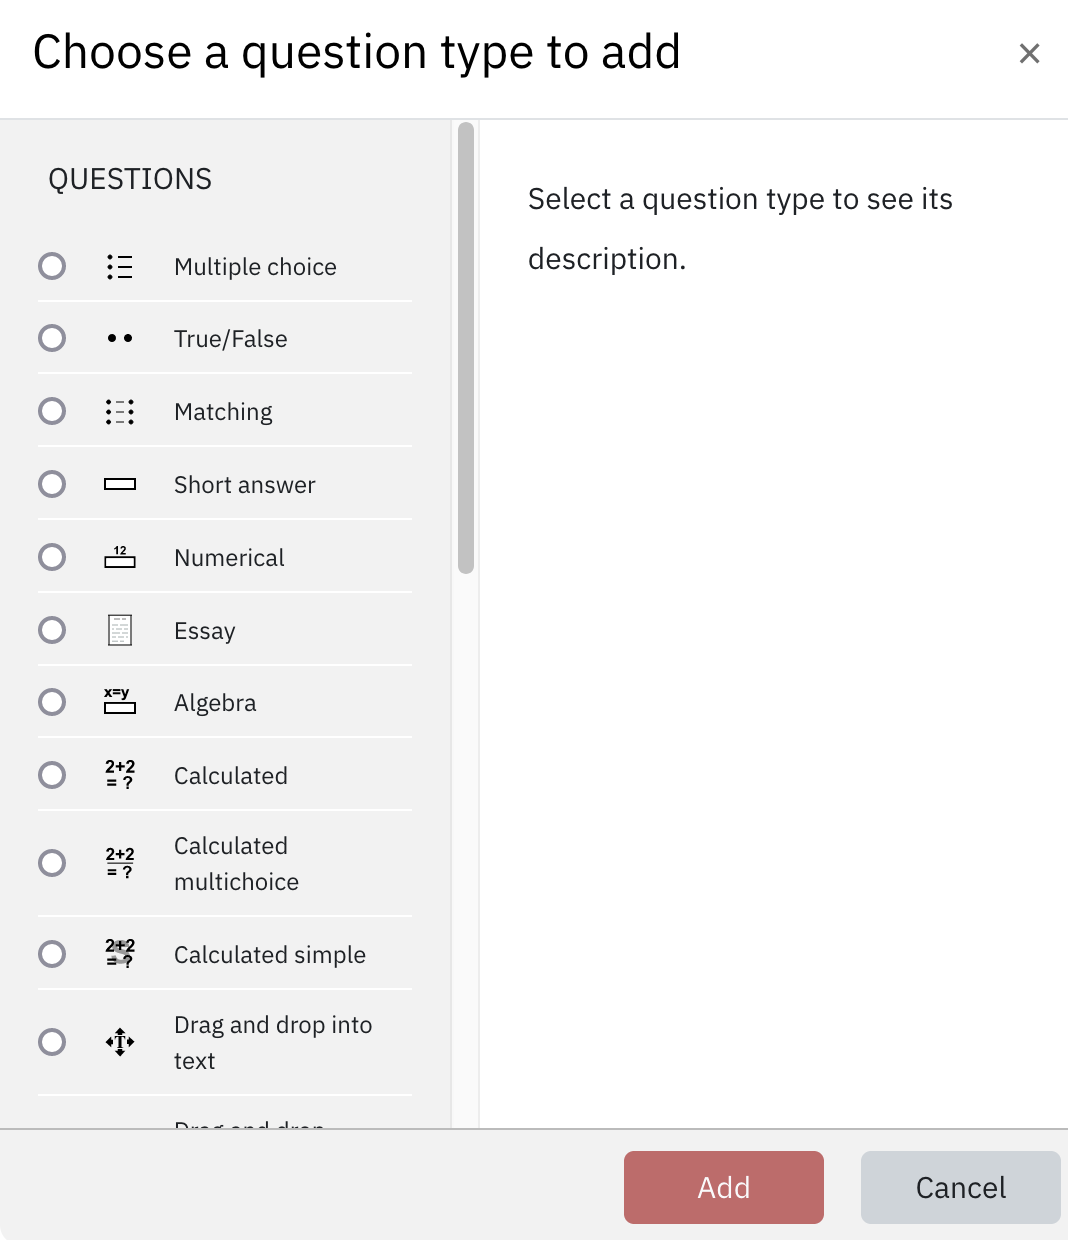
- Click the Add button to view the settings page of the question type.
In this document, we are going to cover the three most commonly used question types, namely multiple choice, short answer, and essay. Learn more about other question types
Creating Multiple Choice Questions
eClass allows single answer or multiple answers for multiple choice questions. In the General section, you set up the question and assign a score. In the Answer section, you enter the list of options and corresponding feedback for each.
- Select an appropriate category in which to create the question from the Category drop-down. If you do not have categories created in your course, questions will be saved in the course default category. Categories can be useful for organizing questions into certain themes
- Enter the title of the question in the Question name. This is visible only to the instructor and will help you identify the question when selecting questions for quizzes
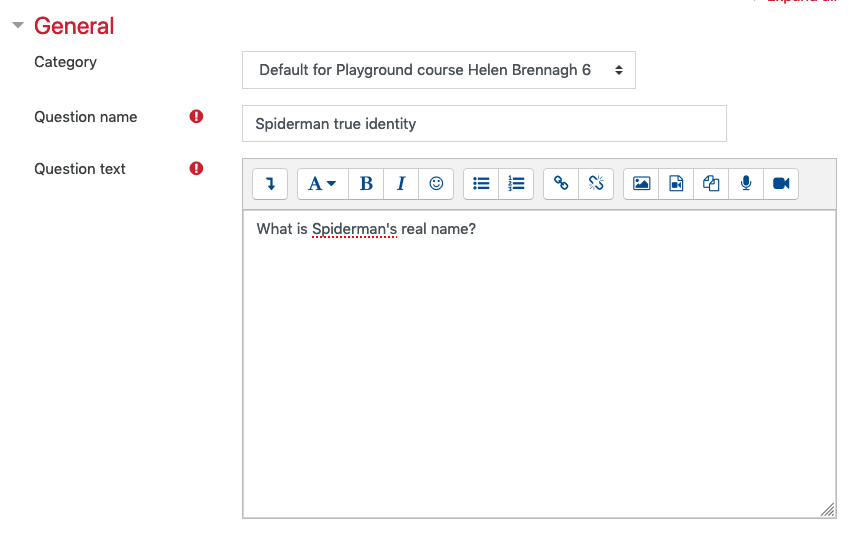
- Enter the question in the Question text edit box, which students will see as the question
- Enter a value for the Default mark if you would like the question to be worth more than other questions
- Enter optional feedback in the General feedback text box that applies to both correct and incorrect answer, which is displayed after the quiz is closed
- Select multiple answers from One or multiple answers drop-down if you would like to allow students to select more than one choice as their answer
- Use the Shuffle the choices checkbox if you'd like to shuffle the answer choices for a question
- Select your preferred numbering display from the Number of choices drop-down list
- Enter an answer in Choice 1 text box
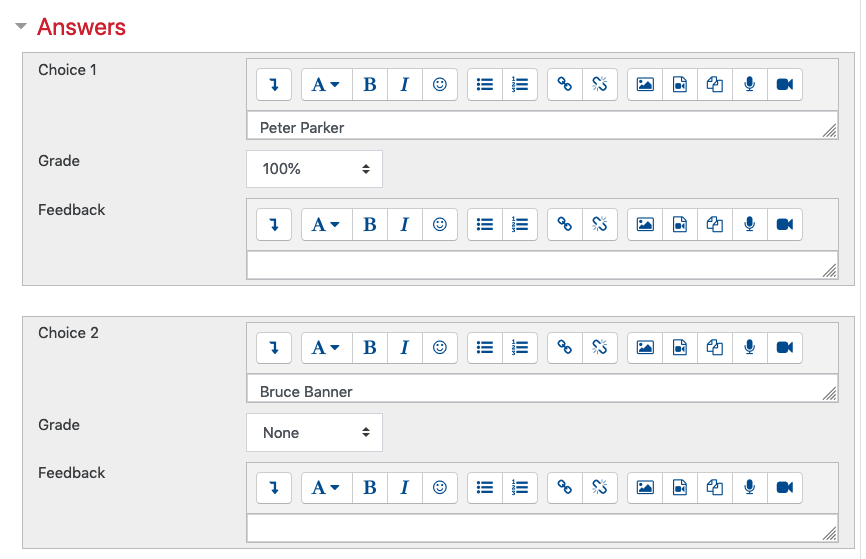
- Select 100% from Grade drop-down if the answer is correct
- Enter a feedback related to the answer in Feedback text box if you would like to provide a feedback for each answer
- Repeat steps 9 to 11 to add additional choices
- Click Save changes to save the question.
Creating Short Answer Questions
A short answer question allows a response of one or a few words that is graded by comparing against various model answers, which may contain wildcards.
- Select an appropriate category in which to create the question from the Category drop-down. If you do not have categories created in your course, questions will be saved in the course default category. Categories can be useful for organizing questions into certain themes
- Enter the title of the question in the Question name. This is visible only to the instructor and will help you identify the question when selecting questions for quizzes
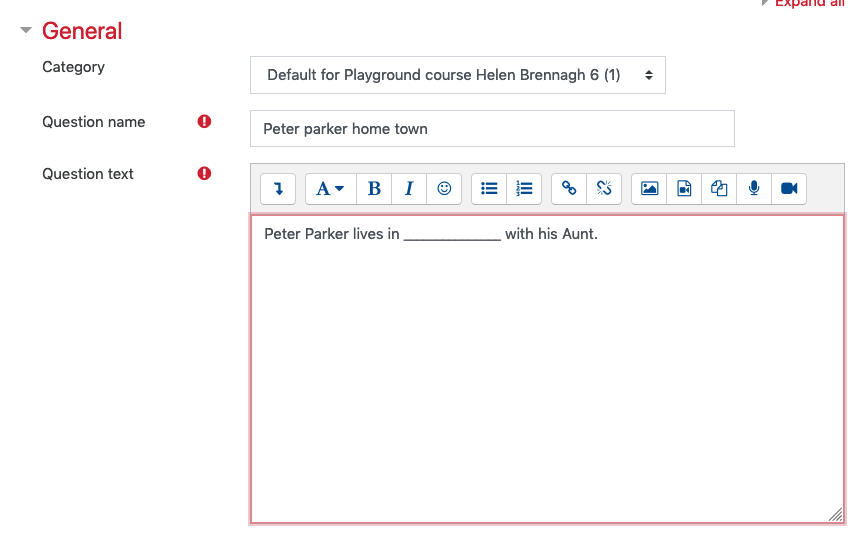
- Enter the question in the Question text edit box, which students will see as the question
- Enter a value for the Default mark if you would like the question to be worth more than other questions
- Enter optional feedback in the General feedback text box that applies to both correct and incorrect answer, which is displayed after the quiz is closed
- Select Yes, the case must match from the Case sensitivity drop-down if you would like to match the letter case
- Enter a correct or partially correct answer into the Answer 1 text box
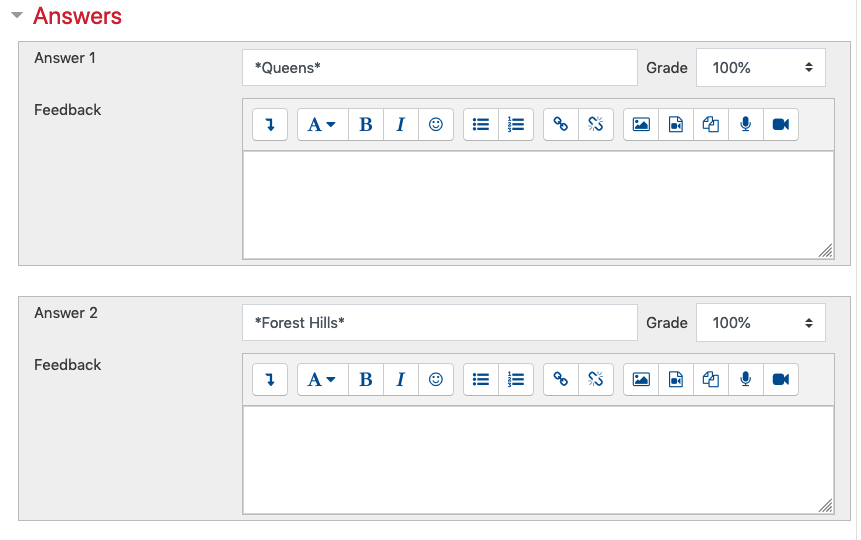
- Select the appropriate grade for the answer from the Grade drop-down list
- Enter optional feedback related to the answer in the Feedback text box, which will be displayed during a review of the quiz
- Repeat steps 7 to 9 to add additional correct or partially correct answers
- Click Save changes to save the question
Creating Essay Questions
An Essay question allows a response of a file upload and/or online text. This must then be graded manually.
- Select an appropriate category in which question is created from Category drop-down. If you do not have categories created in your course, questions will be saved in the course default category. Categories can be useful for organizing questions into certain themes
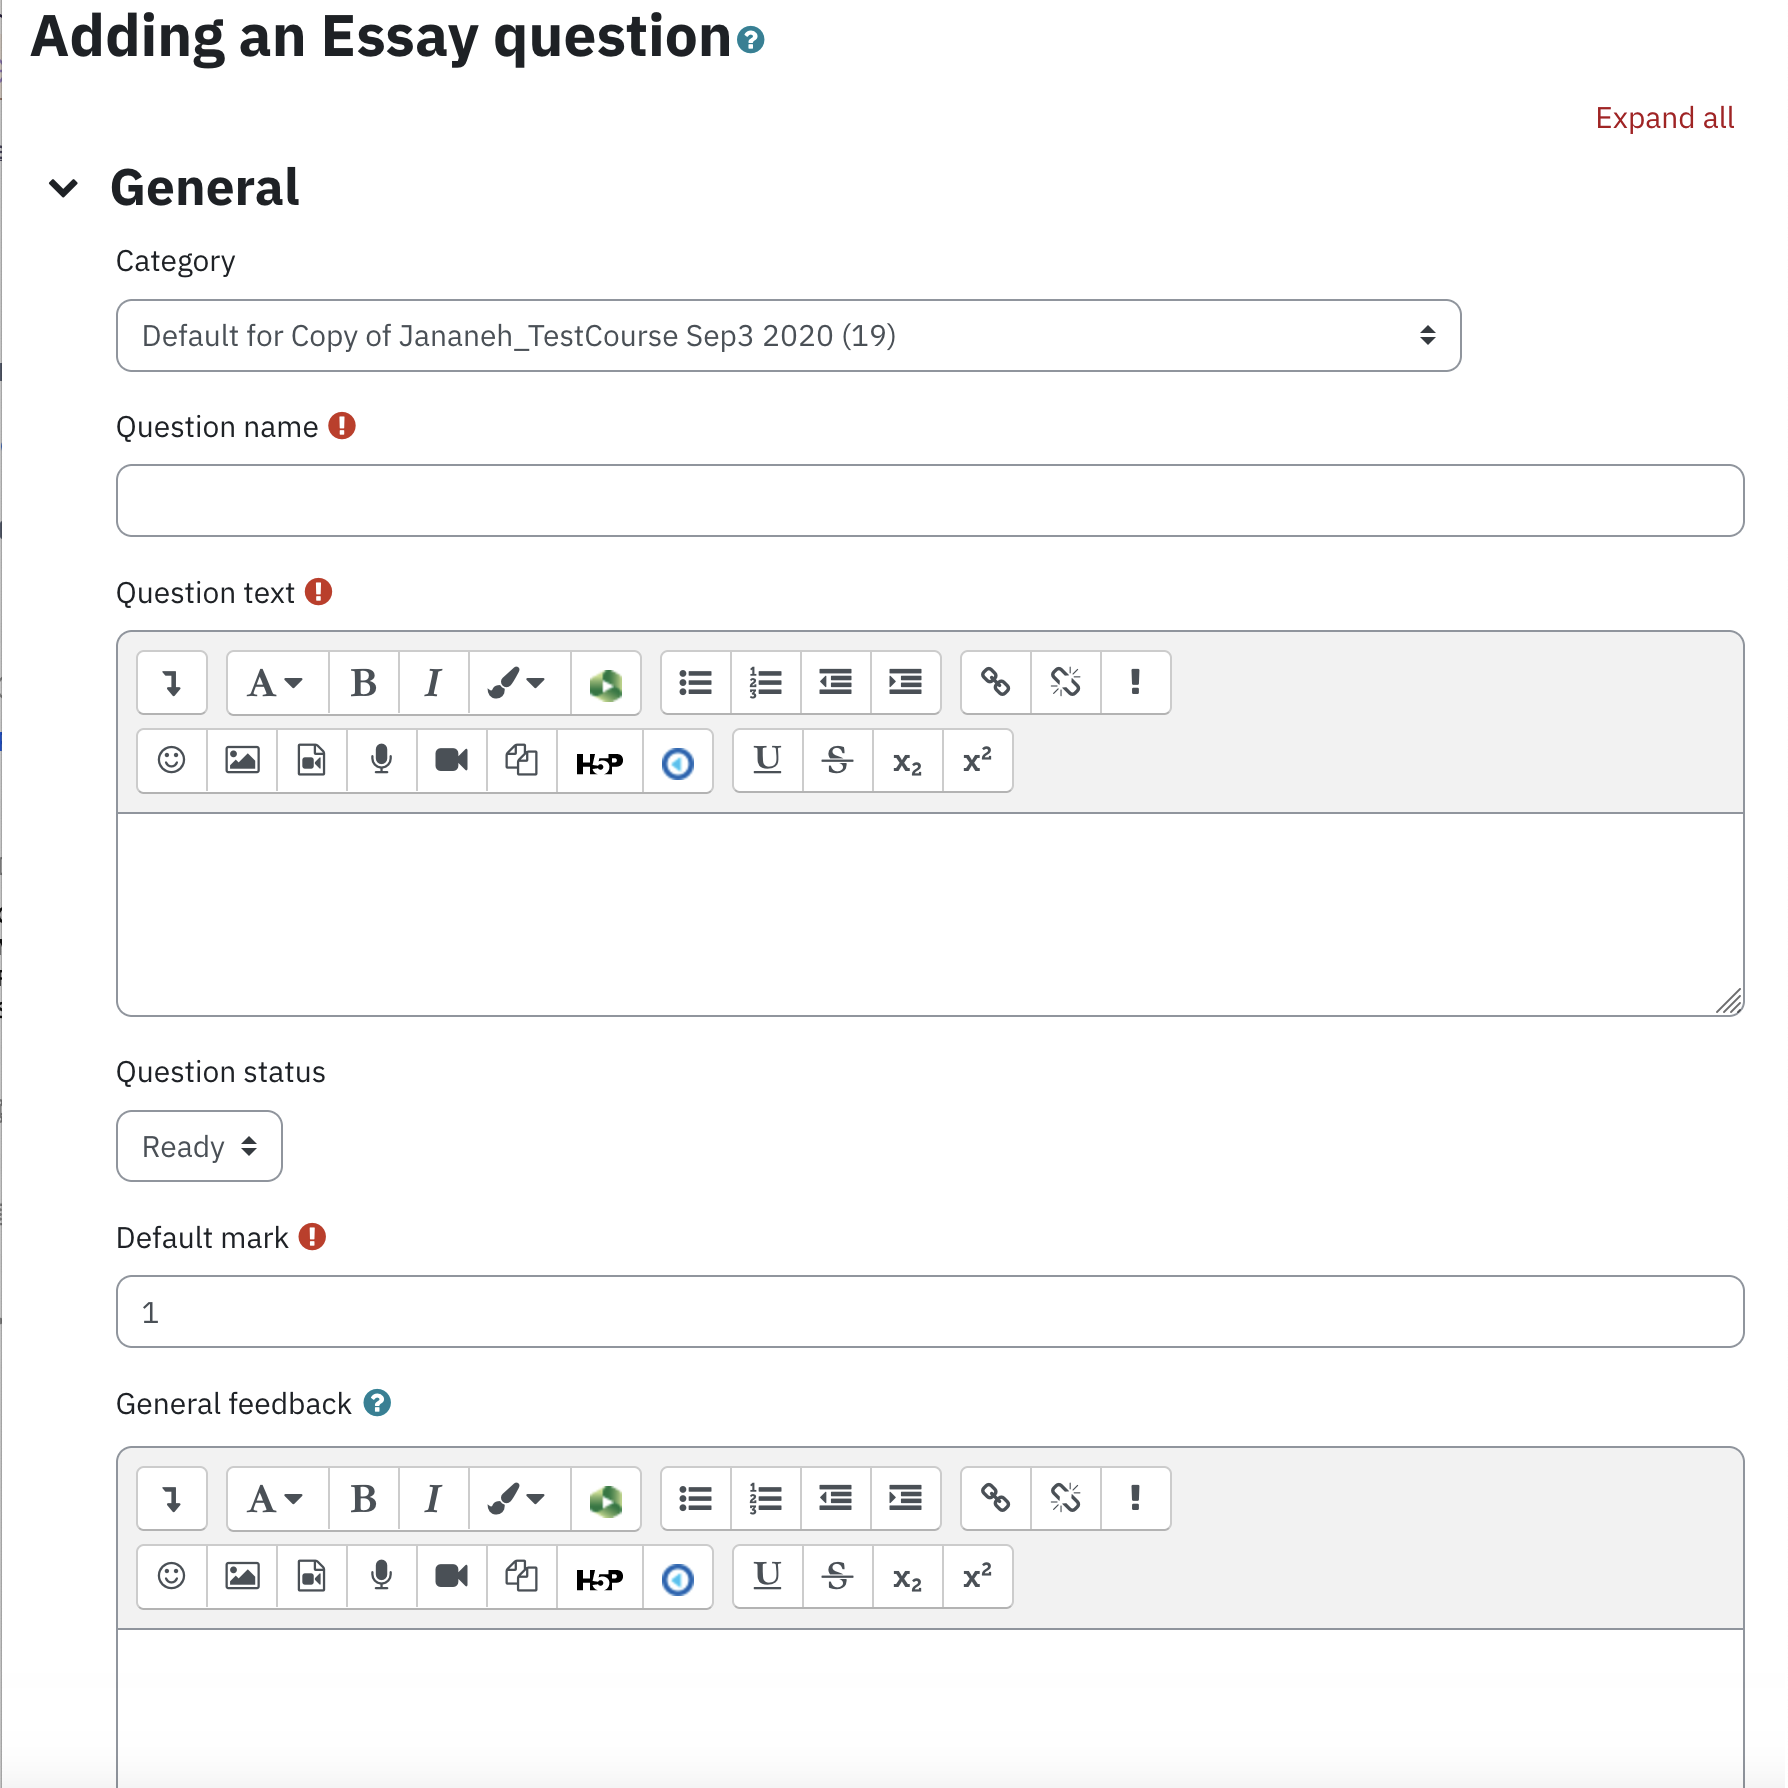
- Enter the title of the question in the Question name. This is visible only to the instructor and will help you identify the question when selecting questions for quizzes
- Enter the question in Question text edit box, which students will see as a question
- Enter a value for the Default mark if you would like a question to worth more than other questions
- Enter optional feedback in the General feedback text box that applies to both correct and incorrect answer, which is displayed after the quiz is closed
- Select the format from the Response format drop-down list
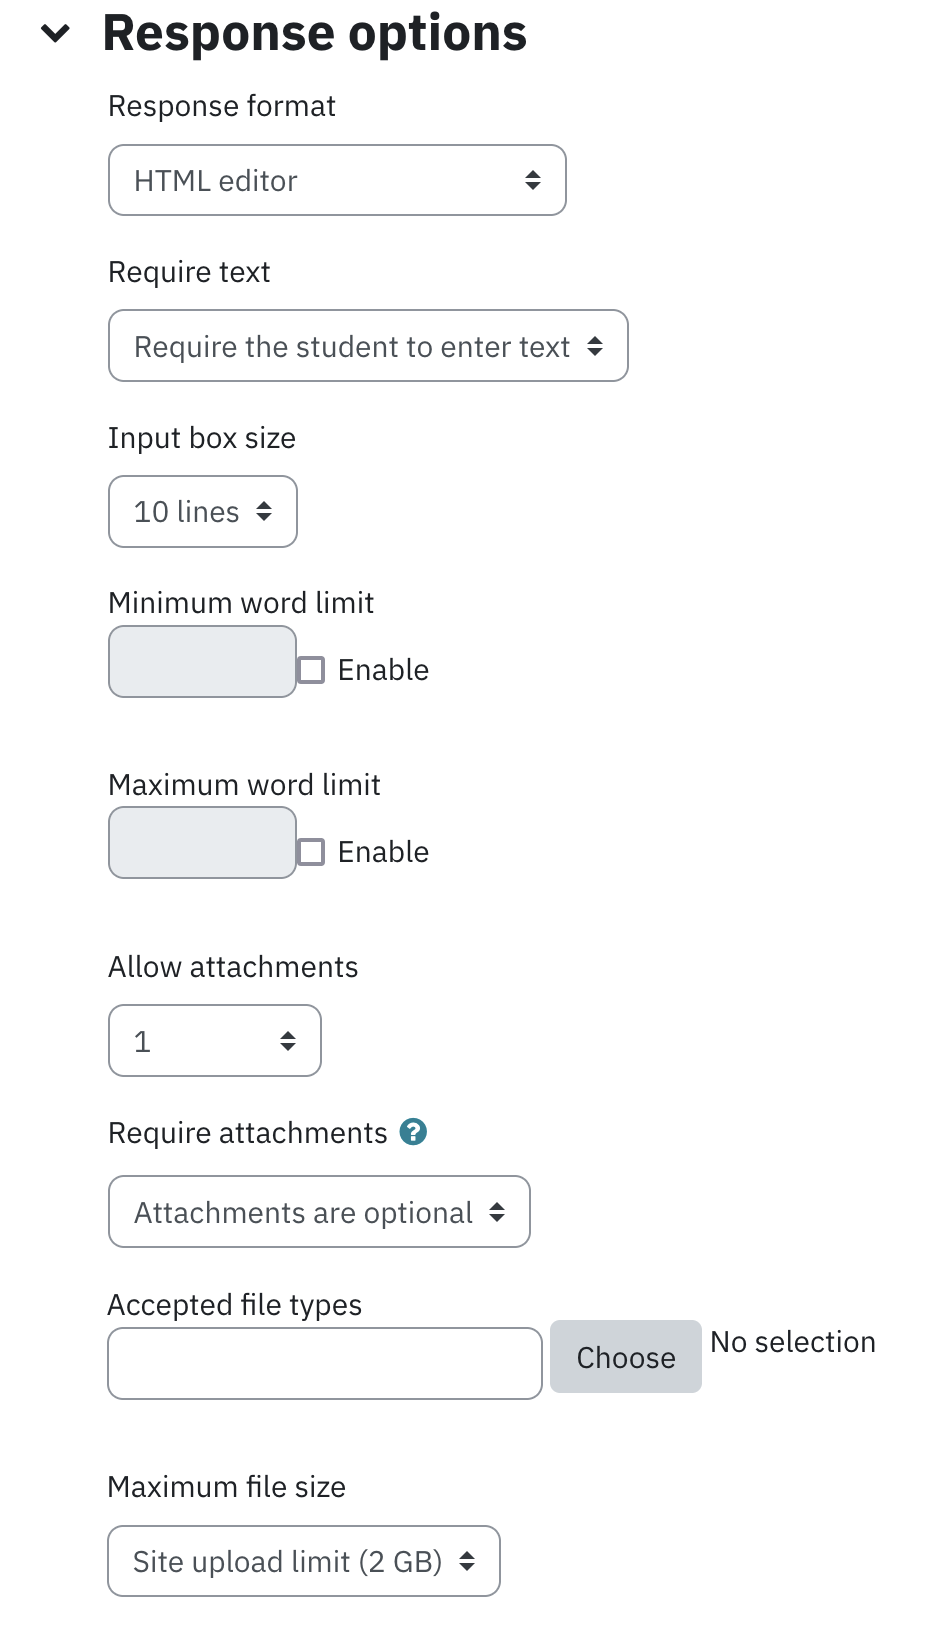
- Select Text input is optional from Require text if text input is not mandatory. Please note when this option is selected at least one attachment must be required
- Select the appropriate length of answer from Input box size drop-down
- Select the number of files from Allow attachments drop-down if you would like to allow students to attach files. Please note when Text input is optional is selected, at least one attachment must be allowed
- Select the number of attachments required from the dropdown list when attachments are allowed. Please note when Text input is optional is selected, at least one attachment must be required
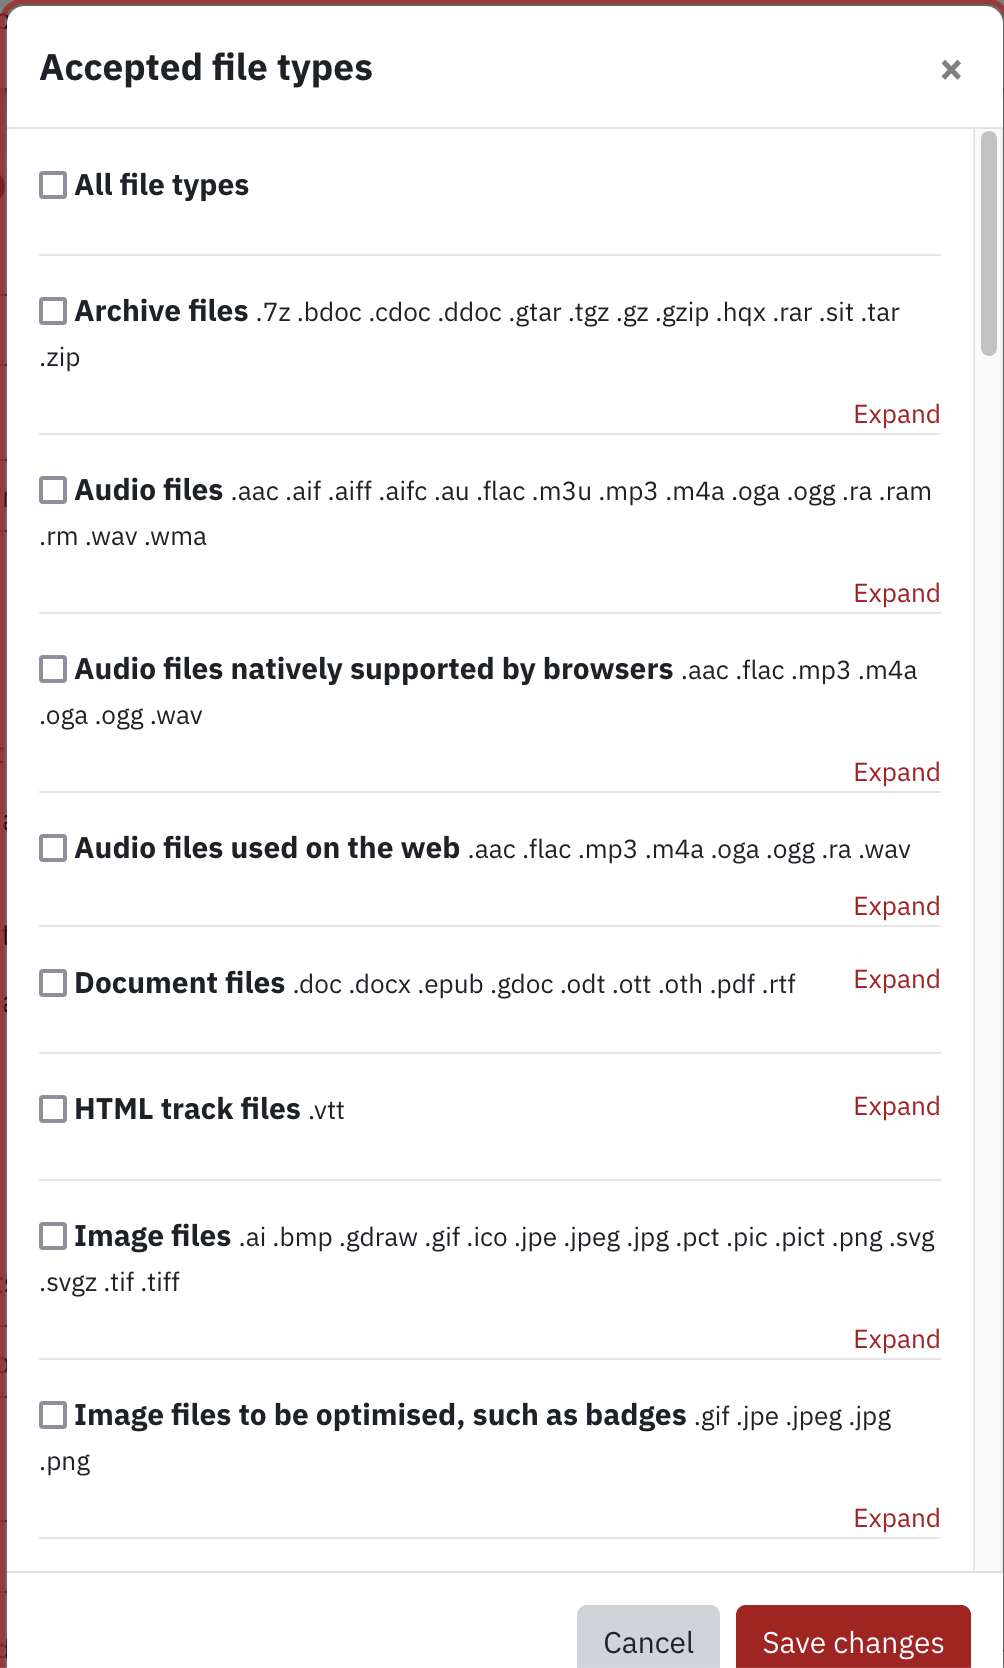
- You can restrict the file format of uploaded files. Click on the Choose button, select the permitted file types and click on Save changes
- Enter a template for students to use as a guide in answering the question in the Response template box. This is an optional feature that allows the teacher to provide help in structuring answers. To display the text editor toolbar to add links, insert media and format text, click the Show more button
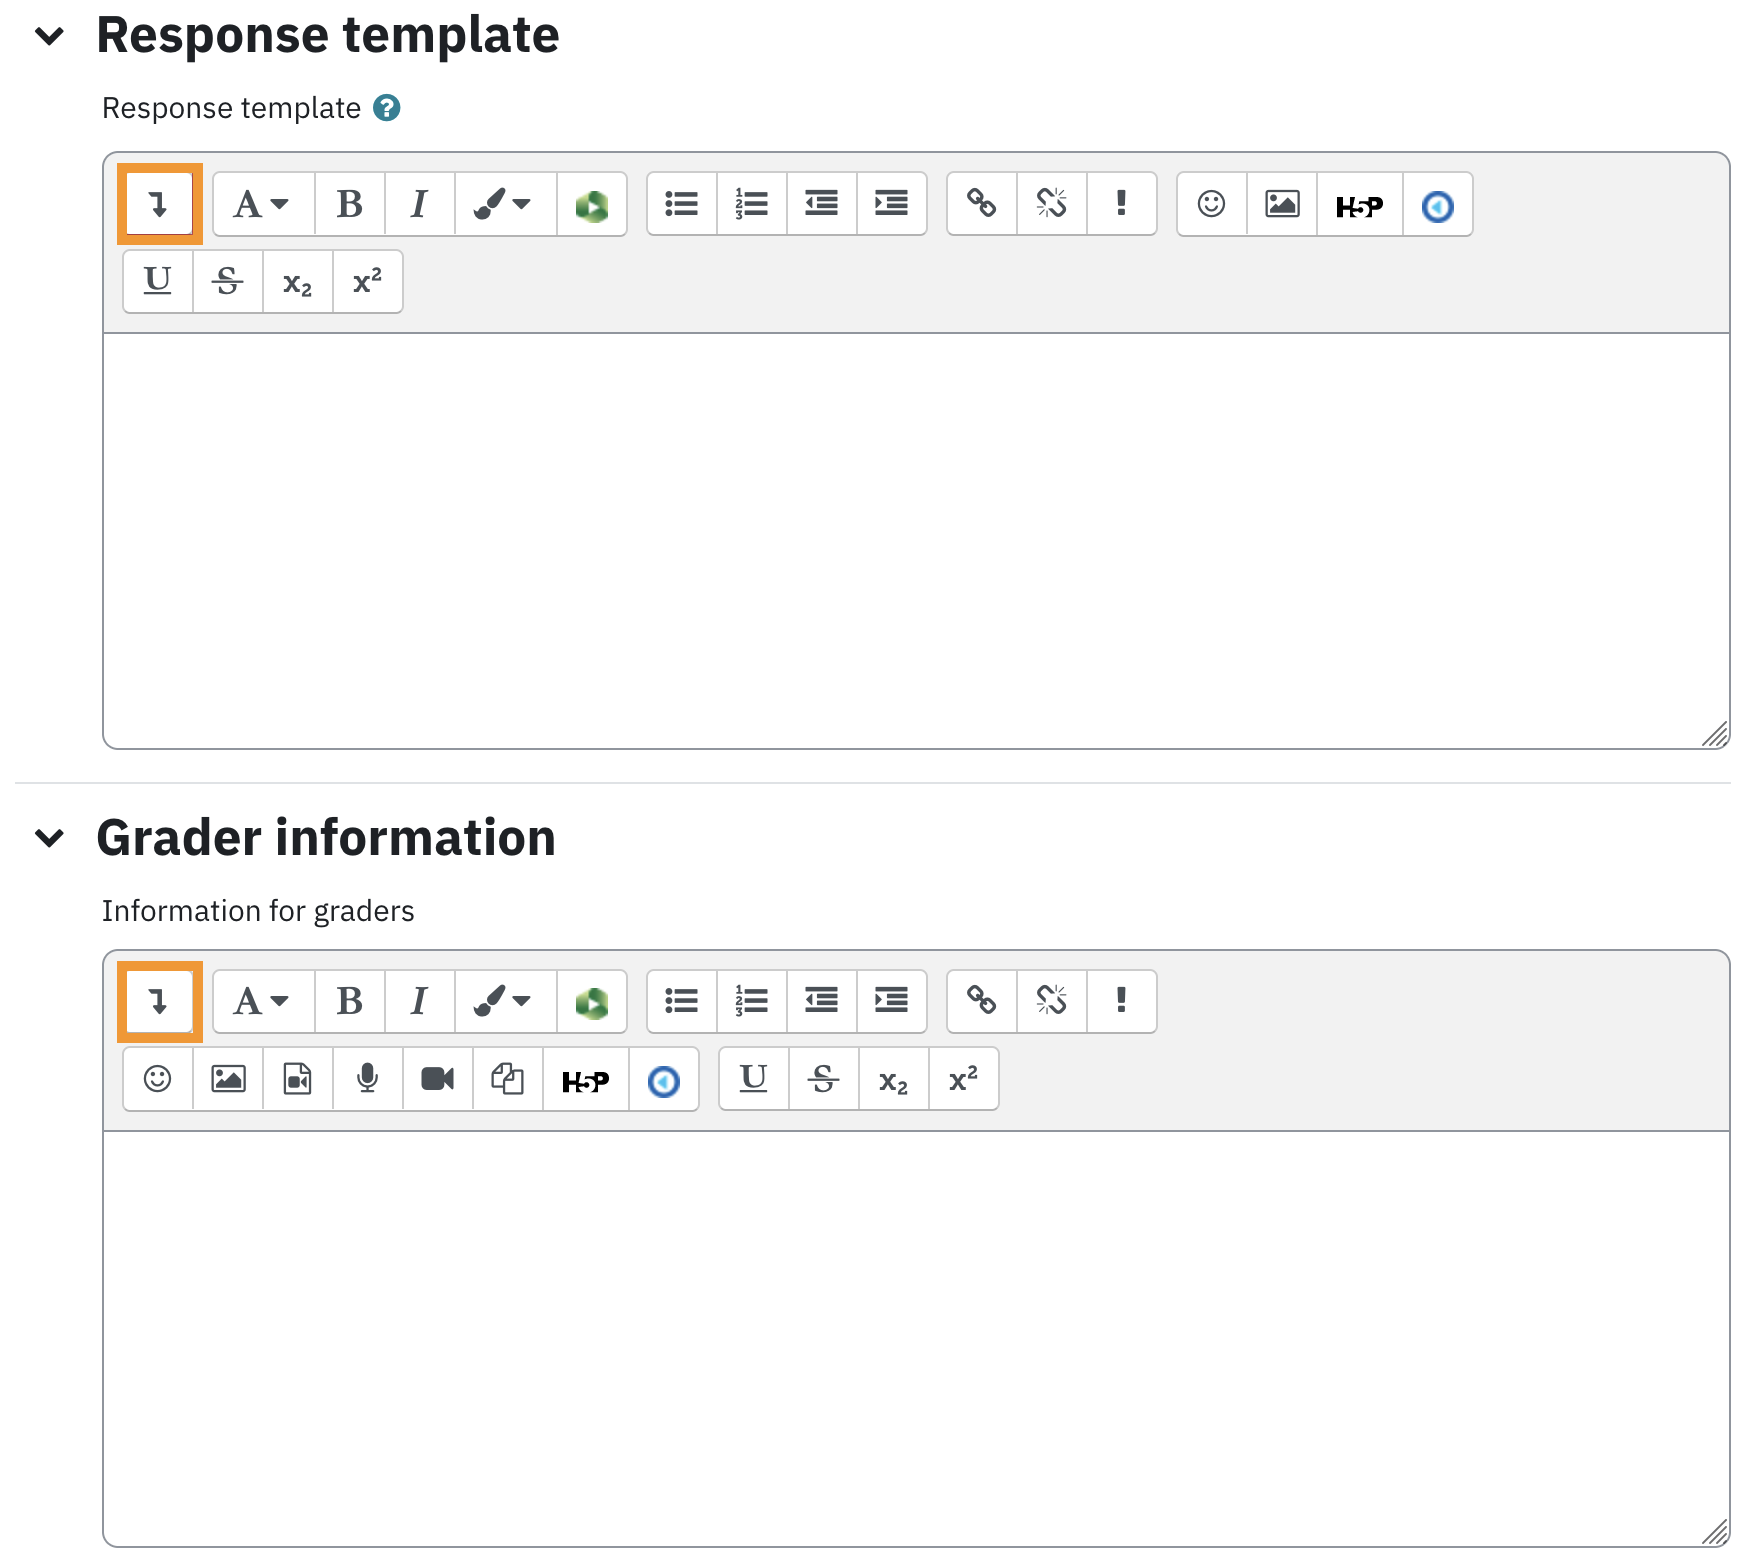
- Enter optional grading criteria or notes in the Information for graders box. These notes are only visible to graders while marking the question
- Click Save changes to save the question.
Adding Questions From a Category
Follow the steps below to add questions from a question bank to the quiz
- Click the Quiz title on the course main page
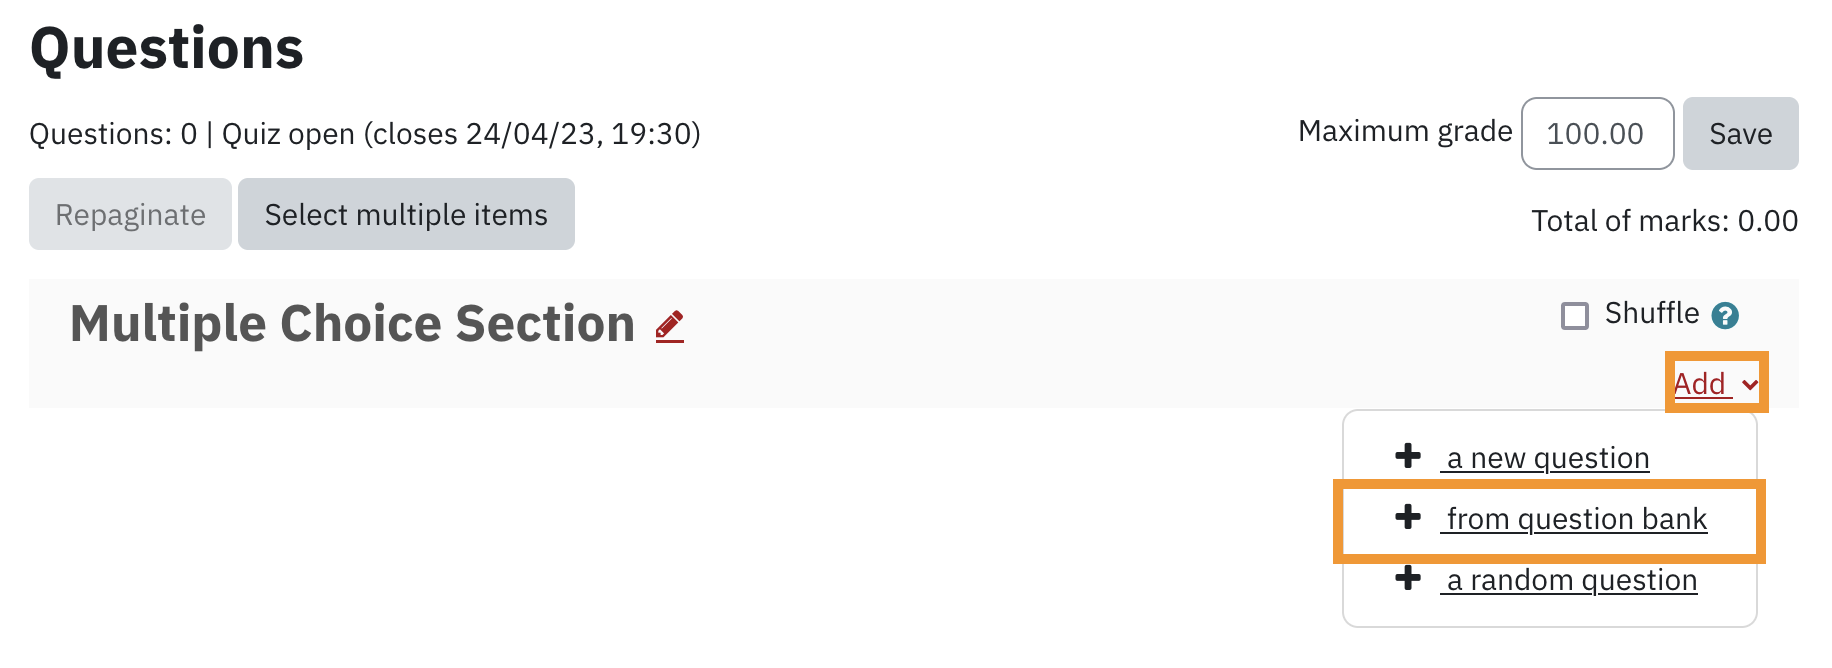
- Click on Add Question

- Click on Add link
- From the drop down menu select from question bank
- Select the category - from which to add questions - from Select a category drop-down
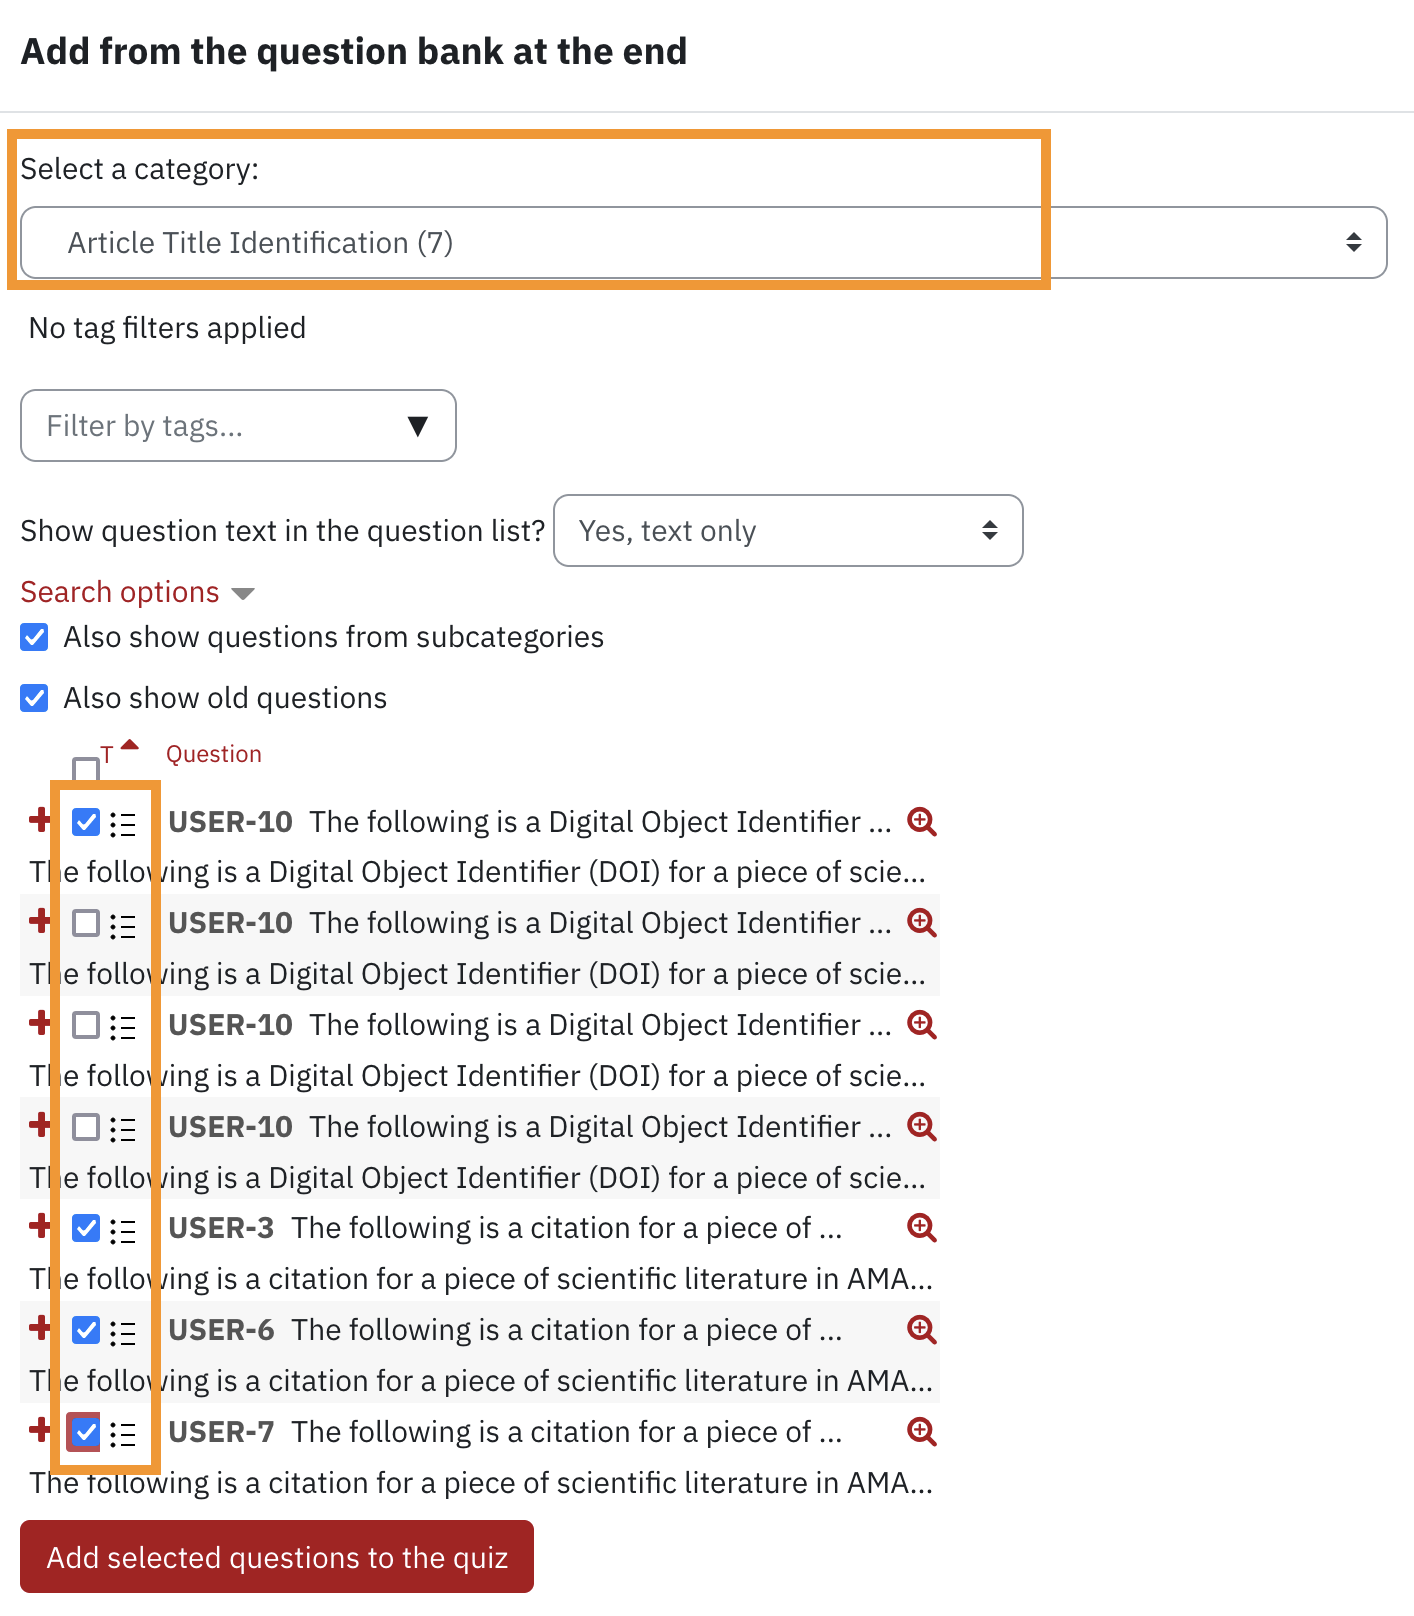
- Place a checkmark in each question's checkbox if you would like to add that question to the quiz
- Click Add selected questions to the quiz when all questions have been selected.
Adding Random Questions From a Category
Adding random questions allows you to give a different set of questions to each student or attempt. These questions are randomly pulled from a set of questions already in a given category. It is recommended to include a large pool of questions in the question bank so that there are enough questions from which the random questions are chosen.
Follow the steps below to have questions randomly chosen from a category:
- Click the Quiz title on the course main page
- Click on Add Question

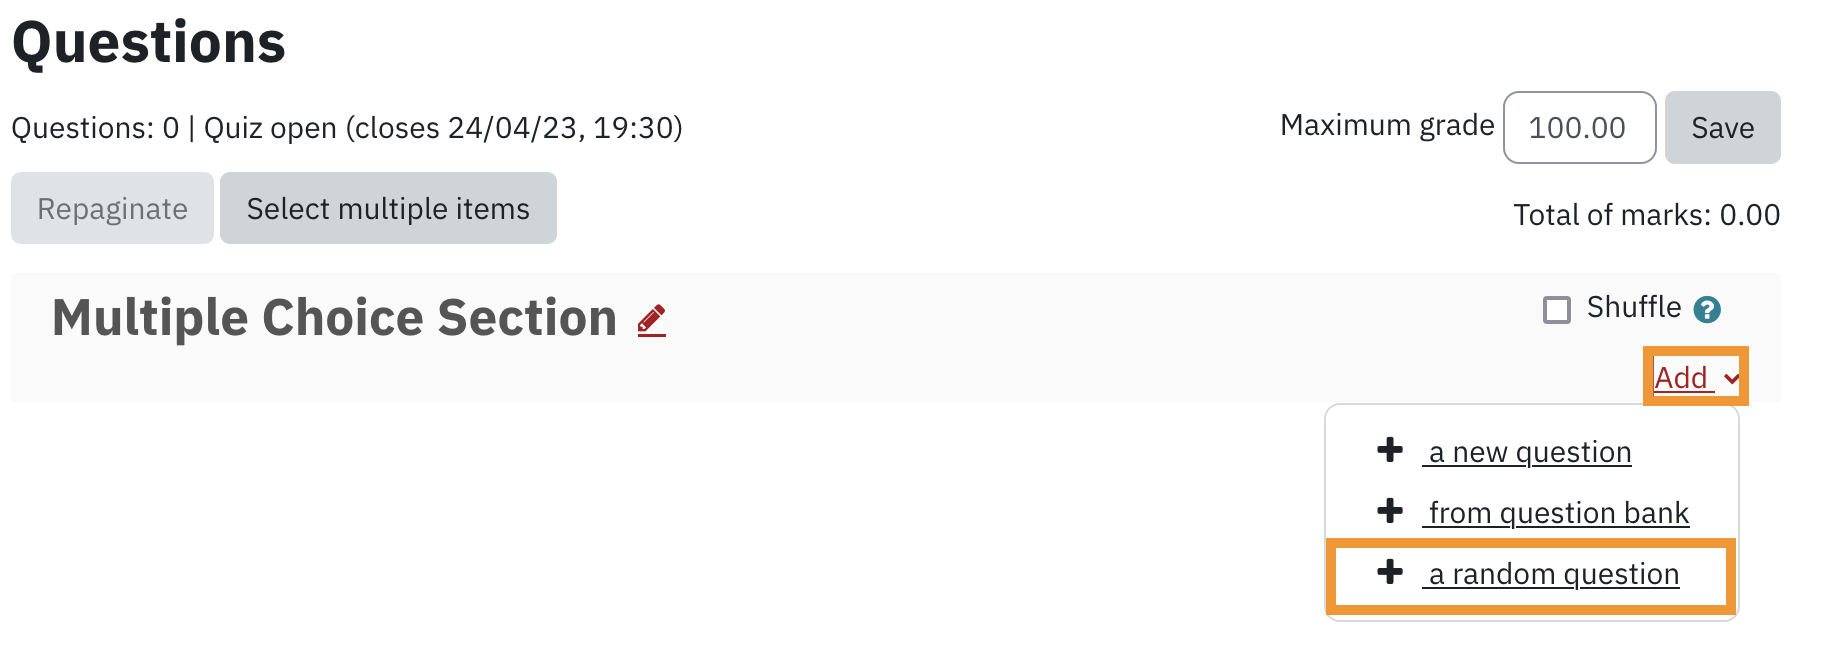
- Click on Add link
- From the drop down menu select a random question
- Select the category - from which to add questions - from the Category drop-down
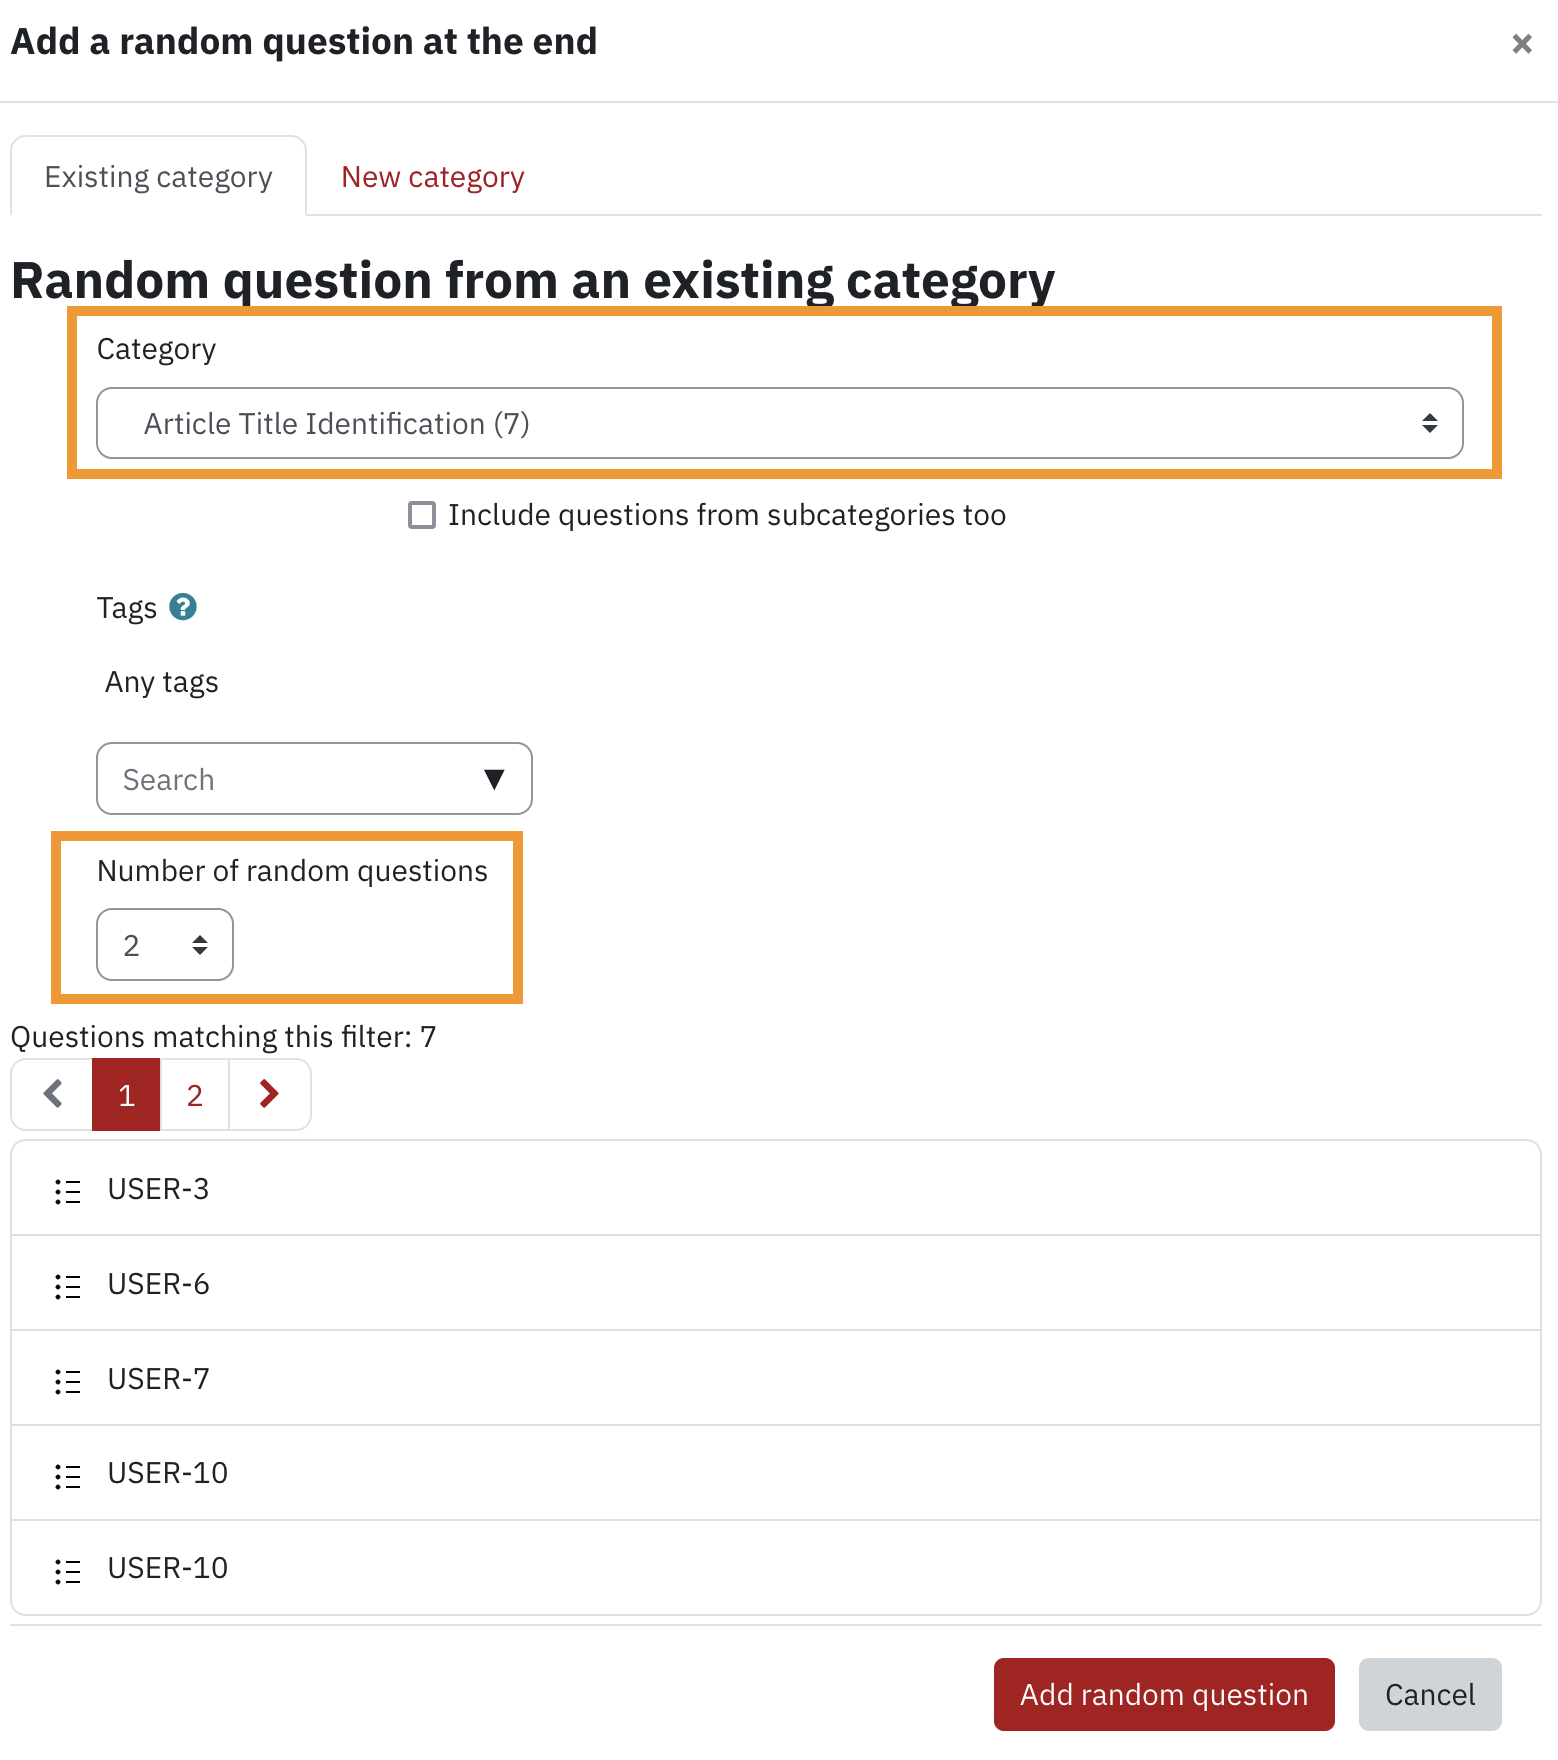
- Select number of questions to be included in the quiz from Number of random questions drop-down list
- Click Add random question.