Copying content from pre-existing eClass sites already on eClass? Follow these import directions.
Backing up your course information to a file
To create an offsite, downloadable backup copy of your eClass, of which the output will be an .MBZ file that is compatible with the current version of eClass, follow these steps:
- Log into eclass.yorku.ca
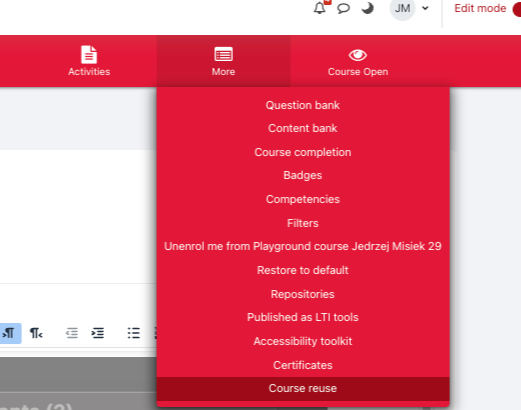
- From the top ribbon, select More, then Course reuse:

- Select Backup from the drop down menu

- Select the items you wish to back up, keeping in mind that the following activities are not supported in the backup process and will cause problems if allowed to be restored:
-
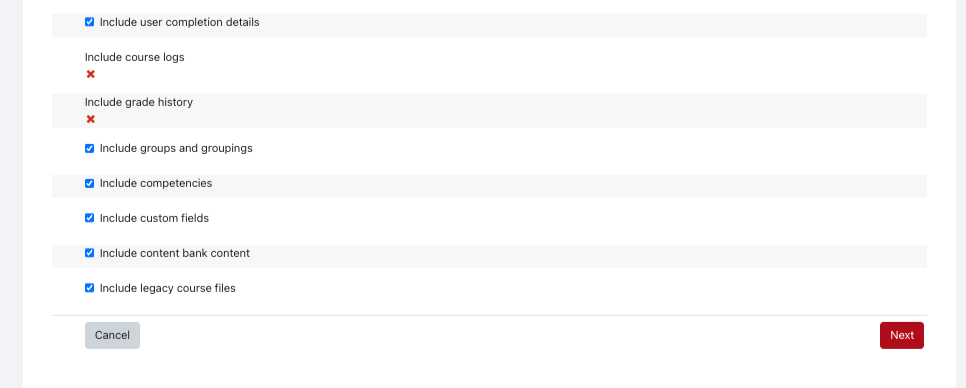
Continuing on, select the options to include in the backup - full description of the options available here.
- Click Jump to final step only if you are absolutely sure your eClass contains no excluded items mentioned above, otherwise manually screen your backup options, clicking Next until the option for Perform backup appears

- Click said Perform backup button - a progress bar will appear, tracking the backup process. This may take anywhere from a few seconds to a couple minutes depending on the size of your course.

- Click Continue
- You will now see the Course Backup Area - your most recent backup will appear at the top of the list - verify that the filename corresponds to the title of your course and the timestamp:

- Click the Download link to save a copy to your device.
Restore your course backup into a new course on eClass
If you'd like to copy content from a prior term that you have in an MBZ file into a new course you are teaching on eClass, follow the steps below:
- Log into eclass.yorku.ca
- From the top ribbon, select More, then Course reuse:

- Select Restore from the drop down menu:

- Select the the .mbz file containing your course backup by either dragging and dropping your file into the area or browse for you file using the Choose a file button. You'll be prompted to select a copyright attestation for your content. To learn more about these copyright statuses visit the copyright website.

- Click Restore.
- On the Backup details page confirm that the materials listed are the ones you wish to copy into your new course and select Continue keeping in mind the restrictions listed above in orange.
- On the Destination page select Restore into this course.
- Select Merge imported content into existing course if you wish to append the backup data into the existing course, otherwise select Replace existing course with imported course if you wish to wipe out all existing data in the destination course and replace it with the backup:
-
 If you already have content in your course and merge in other content just be mindful that you may have duplicates you might need to find and remove once the restore is successful.
- Select Continue.
- Confirm the elements that are being included on the next page and select Next.

- On the Course Settings screen make sure Overwrite course configuration is set to No, verify the content you wish to restore into the course is selected and select Next.
- View the final confirmation page and select Perform Restore.
- You'll see a progress bar indicating percentage of completion and when the restore is complete you will see a success message. Clicking on Continue will take you to your course page with your new content in place.
Troubleshooting
Turnitin error when restoring
If when restoring your course you see the error below it means that your backup file includes Turnitin assignments which cannot be restored and will need to be recreated in the new course. Repeat the backup process on the course you wish to copy content making sure you exclude any Turnitin assignments during the backup process.